

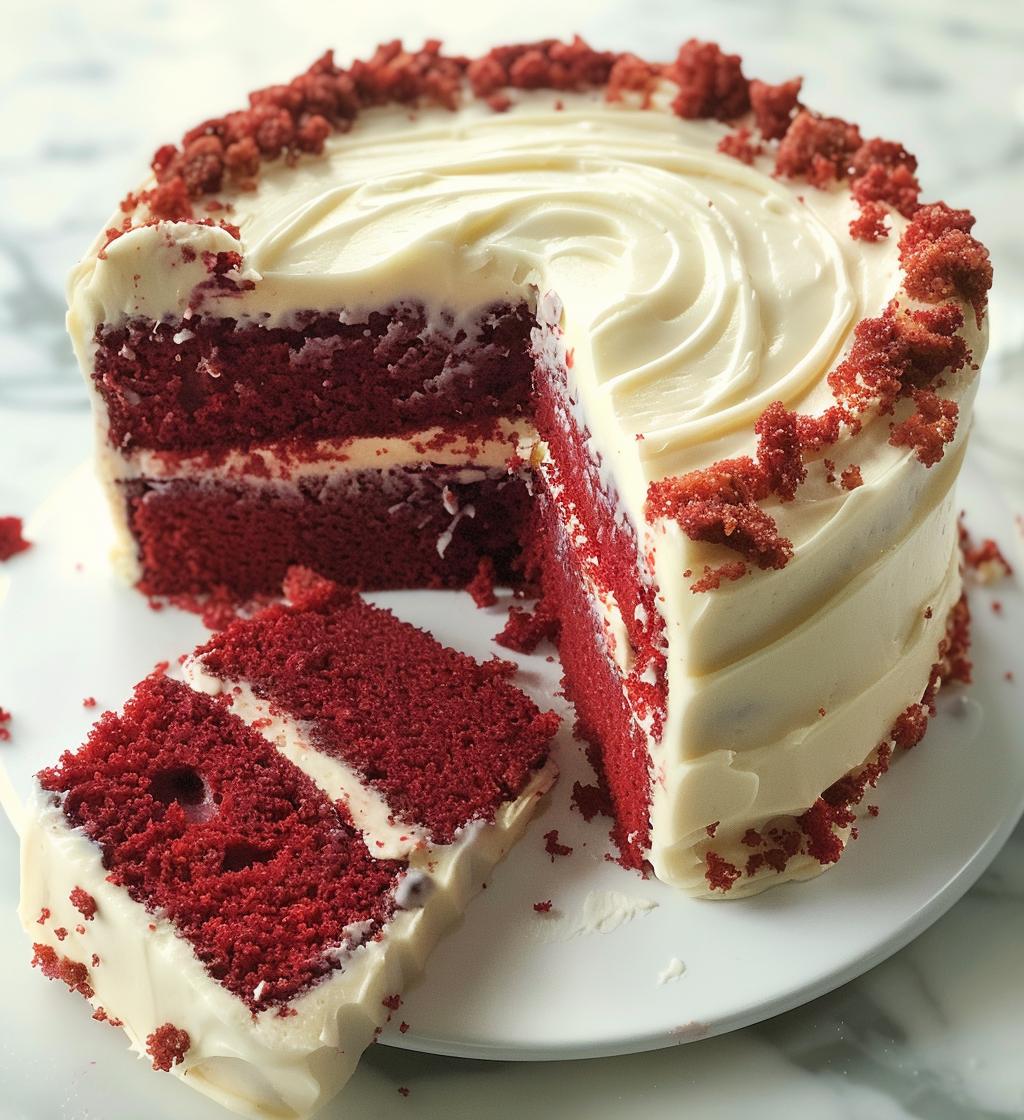
Ah, the magic of red velvet cake! It’s not just a dessert; it’s a beautiful blend of history, color, and flavor that’s captured the hearts of many. Originating in the early 20th century, this cake dazzles with its striking red hue and velvety texture, making it a showstopper for any occasion. I remember the first time I tasted it at a family gathering—my aunt’s version, slathered in rich cream cheese frosting, left me in awe! The moment I took a bite, I was hooked, and ever since, I’ve been on a quest to perfect my own recipe. Trust me, once you try making this red velvet cake, you’ll understand why it’s a favorite for celebrations and cozy get-togethers alike!
Ingredients List
- 2 1/2 cups all-purpose flour
- 1 1/2 cups sugar
- 1 teaspoon baking soda
- 1 teaspoon salt
- 1 teaspoon cocoa powder
- 1 1/2 cups vegetable oil
- 1 cup buttermilk, room temperature
- 2 large eggs, room temperature
- 2 tablespoons red food coloring
- 1 teaspoon vanilla extract
- 1 teaspoon white vinegar
How to Prepare Red Velvet Cake
Preheat and Prepare
First things first—let’s get that oven preheating to 350°F (175°C). This step is crucial because a hot oven ensures your red velvet cake rises beautifully. While it’s warming up, grab those two 9-inch round cake pans. I like to grease them with a little butter or nonstick spray and then dust them with flour. This little trick makes it super easy to release the cakes once they’re baked. Nobody wants a cake that sticks, right? So, make sure to coat them well!
Mix Dry Ingredients
Now, let’s move on to the dry ingredients. In a medium bowl, whisk together 2 1/2 cups of all-purpose flour, 1 1/2 cups of sugar, 1 teaspoon of baking soda, 1 teaspoon of salt, and 1 teaspoon of cocoa powder. The cocoa powder adds just a hint of chocolate flavor, which is what makes this cake so special! Make sure to mix them well so everything is evenly distributed. You want a lovely, smooth base for your cake.
Combine Wet Ingredients
In another large bowl, it’s time for the wet ingredients. Combine 1 1/2 cups of vegetable oil, 1 cup of room temperature buttermilk, 2 large eggs (also at room temperature), 2 tablespoons of red food coloring, 1 teaspoon of vanilla extract, and 1 teaspoon of white vinegar. The room temperature items help create a smoother batter, which means a fluffier cake. Just whisk everything together until the mixture is combined and vibrant!
Combine Mixtures
Now, it’s time to bring it all together! Gradually add your dry ingredients to the wet mixture. I like to do this in three parts—adding a little, mixing, then adding more. This prevents clumps and helps achieve that velvety texture we all love in red velvet cake. Mix until the batter is smooth and no dry streaks remain. Don’t over-mix though; just until everything is well incorporated!
Bake the Cakes
Once your batter is ready, divide it evenly between the prepared cake pans. Pop them into the oven and bake for about 25-30 minutes. To check for doneness, insert a toothpick into the center of the cakes; if it comes out clean or with a few moist crumbs, you’re good to go! Remember, overbaking can dry them out, so keep an eye on the clock!
Cooling and Frosting
After baking, let the cakes cool in the pans for about 10 minutes. This makes them easier to handle. Then, carefully remove them from the pans and transfer them to wire racks to cool completely. Once they’re cool, it’s frosting time! I love using cream cheese frosting—it pairs perfectly with the moistness of the cake. To achieve a beautiful finish, spread a nice layer of frosting between the cake layers and around the sides and top. Don’t be shy; it’s a celebration, after all!
Why You’ll Love This Red Velvet Cake
- Rich Flavor: This cake boasts a deliciously rich and slightly tangy flavor, thanks to the buttermilk and cocoa powder. It’s a taste that lingers and leaves you craving more!
- Moist Texture: With a perfect balance of oil and buttermilk, this red velvet cake is incredibly moist and tender. Each bite melts in your mouth, making it hard to resist.
- Easy to Make: Don’t let the stunning looks fool you! This recipe is straightforward with simple steps. Even if you’re a beginner, you’ll feel like a pro in the kitchen.
- Perfect for Celebrations: Whether it’s a birthday, anniversary, or just because, this cake is a showstopper. Its vibrant color and delicious flavor make it a go-to for any special occasion.
- Crowd-Pleaser: I’ve yet to meet someone who doesn’t love a slice of red velvet cake! It’s universally adored, making it the perfect dessert to impress family and friends.
Tips for Success
Want your red velvet cake to turn out perfectly every time? Let me share some of my top tips that have made all the difference in my baking journey!
- Use Cake Flour: For a richer, lighter texture, go ahead and use cake flour instead of all-purpose flour. It makes a world of difference and gives your cake that dreamy, velvety feel!
- Adjust Food Coloring: The amount of red food coloring can vary depending on the brand and your personal preference. Start with 2 tablespoons, but feel free to add more if you want a deeper hue. Just remember, less is more when it comes to achieving that perfect shade!
- Room Temperature Ingredients: Make sure your buttermilk and eggs are at room temperature before mixing. This helps create a smoother batter and ensures even baking. You want everything to blend beautifully!
- Don’t Overmix: When combining your wet and dry ingredients, mix just until combined. Overmixing can lead to a dense cake. You want that light, airy texture, so be gentle!
- Cool Completely: After baking, let your cakes cool completely on wire racks before frosting. If they’re even slightly warm, the frosting might melt and slide off, which we definitely want to avoid!
- Storing Leftovers: If you happen to have any leftovers (which is rare, trust me!), store them in an airtight container at room temperature for up to 2 days. For longer storage, keep them in the fridge. Just be sure to let them come back to room temperature before indulging again!
With these tips in your back pocket, you’re well on your way to becoming a red velvet cake master!
Nutritional Information
Now, let’s talk about the numbers behind this delicious red velvet cake! Keep in mind that nutritional values can vary based on the specific ingredients and brands you use, so these are just typical estimates.
- Serving Size: 1 slice
- Calories: Approximately 350
- Fat: 18g
- Saturated Fat: 3g
- Unsaturated Fat: 15g
- Trans Fat: 0g
- Cholesterol: 45mg
- Sodium: 300mg
- Carbohydrates: 45g
- Fiber: 1g
- Sugar: 25g
- Protein: 4g
So, while you’re enjoying this delightful cake, you can savor each bite knowing a bit about what’s in it! Just remember, moderation is key, even with such a tempting treat. Happy baking!
FAQ Section
What can I substitute for buttermilk?
If you don’t have buttermilk on hand, no worries! You can easily make your own by mixing 1 cup of milk with 1 tablespoon of lemon juice or white vinegar. Let it sit for about 5-10 minutes until it thickens slightly. Voila! You’ve got a perfect buttermilk substitute.
Can I make this cake ahead of time?
Absolutely! You can bake the cakes a day or two in advance. Just let them cool completely, wrap them tightly in plastic wrap, and store them in the fridge. When you’re ready to serve, pull them out, frost, and enjoy! It’s a great way to save time on the day of your celebration.
What kind of frosting pairs well with red velvet cake?
The classic choice is cream cheese frosting, and trust me, it’s a match made in dessert heaven! The tanginess of the cream cheese complements the rich flavor of the cake beautifully. However, if you’re feeling adventurous, you could also try a fluffy vanilla buttercream or even a chocolate ganache for an indulgent twist!
Can I use a different type of oil?
While vegetable oil is the go-to for this recipe, you can substitute it with canola oil or even melted coconut oil if you prefer. Just keep in mind that different oils can slightly alter the flavor, but they’ll still yield a moist cake!
How do I fix a dry red velvet cake?
If you find your cake turns out dry, it might be due to overbaking. Always check your cakes a few minutes before the recommended baking time. If you want to add moisture back in, you can brush the cooled cake layers with a simple syrup made from equal parts sugar and water, heated until dissolved. It’s a great way to revive that luscious texture!
Storage & Reheating Instructions
So, you’ve baked this gorgeous red velvet cake and somehow managed to have some leftovers—lucky you! To keep your cake fresh and delicious, it’s important to store it properly. I recommend placing any uneaten slices in an airtight container. This helps to prevent them from drying out and keeps that rich flavor intact. You can store it at room temperature for up to 2 days, but if you need to keep it longer, pop it in the fridge. Just remember to let it come back to room temperature before digging in again; it tastes best that way!
If you want to reheat a slice (because who doesn’t love a warm piece of cake?), simply pop it in the microwave for about 10-15 seconds. Keep an eye on it—don’t let it get too hot or the frosting might melt! Alternatively, you could warm it in a low oven (about 300°F or 150°C) for a few minutes. This method gives you that fresh-baked vibe without sacrificing any of that lovely texture. Enjoy every last crumb!