
Oh, the joy of the holiday season! Nothing quite captures the spirit of Christmas like delightful no-bake Christmas desserts. Seriously, these treats are a lifesaver when you’re short on time but still want to impress everyone at your holiday gatherings. The best part? They’re ridiculously easy to whip up, requiring no oven time at all! Just mix, chill, and serve. Not only are they deliciously sweet and festive, but they also let you spend more time enjoying the festivities with family and friends rather than being stuck in the kitchen. Trust me, you’re going to love these!

Ingredients for No-bake Christmas Desserts
Gathering the right ingredients is half the fun! Here’s everything you’ll need to create these delightful no-bake Christmas desserts:
- 1 cup of crushed graham crackers: This will form the base of your dessert, giving it that lovely crunch.
- 1/2 cup of unsweetened cocoa powder: For that rich, chocolatey flavor that makes every bite irresistible.
- 1/2 cup of powdered sugar: This adds just the right sweetness to balance out the cocoa.
- 1/2 cup of melted butter: It helps bind everything together and gives a wonderful richness.
- 1 teaspoon of vanilla extract: A splash of this magical ingredient elevates the flavor to a whole new level.
- 1 cup of mini marshmallows: These fluffy bites add a fun texture and a hint of sweetness.
- 1/2 cup of chocolate chips: Because who can resist a little extra chocolate?
- 1/4 cup of crushed peppermint candies: A festive touch that adds a refreshing crunch and holiday spirit!
Make sure to have everything measured out and ready to go, so you can dive right into the fun of mixing and creating your sweet treats!
How to Prepare No-bake Christmas Desserts
Now that you’ve got all your ingredients ready, it’s time to dive into the fun part—making these delightful no-bake Christmas desserts! I promise, you’re going to love how simple and satisfying this process is.
Mixing the Base
First things first, grab a large mixing bowl and combine the dry ingredients. Pour in that 1 cup of crushed graham crackers, 1/2 cup of unsweetened cocoa powder, and 1/2 cup of powdered sugar. Give them a good stir until they’re evenly mixed—this is where the magic begins! Once that’s done, it’s time for the wet ingredients. Add in 1/2 cup of melted butter and 1 teaspoon of vanilla extract. Mix everything together until it’s fully combined; you want a nice, cohesive mixture that sticks together but isn’t too wet.
Folding in the Add-ins
Next up, it’s time to fold in those delicious add-ins! Gently add in 1 cup of mini marshmallows and 1/2 cup of chocolate chips. Now, here’s a little tip: be gentle when folding these in! You want to keep those marshmallows fluffy and avoid crushing the chocolate chips. Just use a spatula to carefully lift and turn the mixture until they’re evenly distributed—trust me, it’s worth it for that perfect texture!
Setting the Dessert
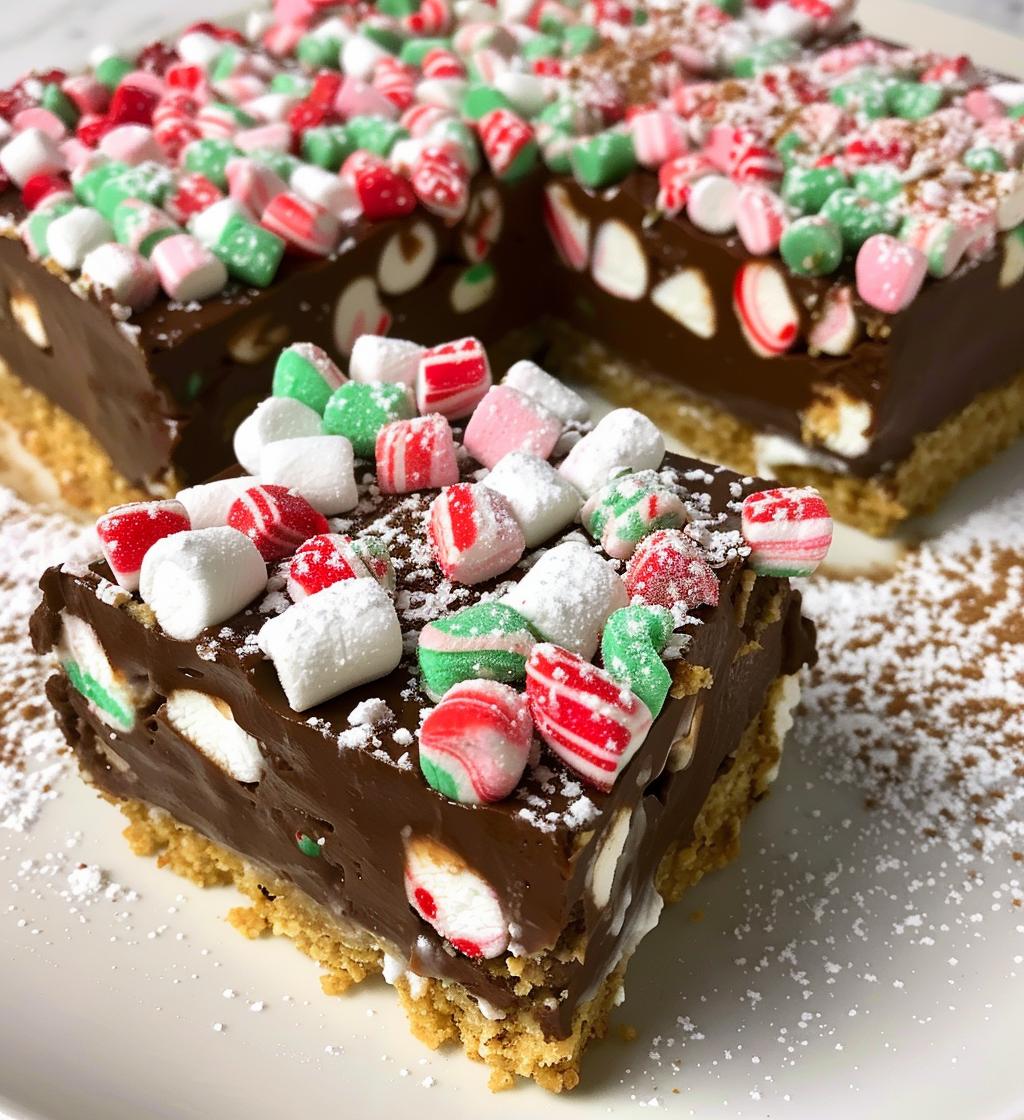
Alright, now we’re getting close! Grab a lined baking dish (this makes removing the squares so much easier later on!). Press the chocolatey mixture into the dish using your hands or the back of a spatula. Make sure it’s packed down well and even. Once that’s done, sprinkle 1/4 cup of crushed peppermint candies on top. This will add a festive crunch and a burst of flavor that screams Christmas!
Chilling Time
Now comes the hardest part—waiting! Pop the dish into the refrigerator and let it chill for about 2 hours. This is crucial to help the dessert set properly. While you’re waiting, you can start thinking about how you’re going to serve these little delights. Maybe with some hot cocoa by the fire? Yum!
Why You’ll Love This Recipe
- Quick and Easy: You can whip these up in just 15 minutes! No baking, no fuss—just mix and chill!
- Perfect for the Holidays: These no-bake Christmas desserts capture the festive spirit with delightful flavors and a beautiful presentation.
- Kid-Friendly: Kids will love helping out, whether it’s crushing graham crackers or sprinkling on the toppings. It’s a fun family activity!
- Customizable: Feel free to mix and match toppings! Swap in your favorite nuts, fruits, or different candies to make it your own.
- Make Ahead: They’re perfect for prepping in advance, so you can focus on the holiday fun without last-minute stress.
- Decadently Delicious: With layers of chocolate, marshmallows, and a hint of peppermint, each bite is a delightful explosion of flavor!
- Great for Parties: These treats are a crowd-pleaser and look beautiful on any dessert table, making them a festive addition to your holiday gatherings.
Nutritional Information for No-bake Christmas Desserts
Now, I know you’re curious about what’s in these delicious little squares! Here’s the estimated nutritional information for each serving (that’s one square, just to clarify!). Remember, these values are estimates and can vary based on the exact ingredients you use:
- Calories: 200
- Fat: 10g
- Saturated Fat: 5g
- Unsaturated Fat: 4g
- Trans Fat: 0g
- Sodium: 50mg
- Total Carbohydrates: 25g
- Fiber: 1g
- Sugar: 15g
- Protein: 2g
- Cholesterol: 15mg
These treats balance sweetness with a satisfying texture, making them perfect for indulging during the holiday season without going overboard. Enjoy every bite, and don’t forget to share with friends and family!
Tips for Success
Want to ensure your no-bake Christmas desserts turn out perfectly? I’ve got some pro tips just for you! These little nuggets of wisdom will help you nail this recipe every time.
- Adjusting Sweetness: If you prefer a less sweet treat, feel free to cut down on the powdered sugar. You can always taste the mixture before pressing it into the dish—just keep in mind that the chilling process can mellow the sweetness a bit.
- Experiment with Toppings: Don’t be afraid to get creative with your toppings! Try using crushed nuts, like walnuts or pecans, or switch out the peppermint for some crushed Oreos for a fun twist. You could even drizzle some caramel or chocolate sauce on top for an extra treat!
- Use Quality Ingredients: Since the flavors are so prominent in these no-bake desserts, using high-quality cocoa powder and chocolate chips can make a big difference. Trust me, it’s worth it for that rich, decadent flavor!
- Chill Longer for Firmness: If you want your squares to be extra firm, don’t hesitate to chill them a bit longer. Just make sure they’re well-covered to avoid any fridge odors seeping in!
- Choose Your Dish Wisely: A glass or ceramic baking dish works well for these desserts, as it’s easier to see the layers and allows for even chilling. Plus, it looks pretty when serving!
- Get the Kids Involved: This is a great recipe to make with kids! Let them help with the mixing and topping. It’s a fantastic way to create holiday memories together while making something delicious.
With these tips in your back pocket, you’re all set to make the ultimate no-bake Christmas desserts. Enjoy the process, and don’t be afraid to put your own spin on it!
Storage & Reheating Instructions
Now that you’ve got some scrumptious no-bake Christmas desserts ready to go, let’s talk about how to keep them fresh and tasty for as long as possible! Trust me, you’ll want to savor every last bite.
To store your delicious squares, simply place them in an airtight container. This is key to keeping them from drying out or absorbing any funky fridge odors. I like to layer parchment paper between the squares to prevent them from sticking together—no one wants a messy dessert experience!
These treats will stay fresh in the refrigerator for about up to a week. If you somehow have leftovers (which I doubt, because they’re so good!), just make sure to keep them chilled until you’re ready to serve them again. There’s no need to reheat—enjoy them straight from the fridge for that delightful cool treat!
And here’s a fun tip: if you want to make them last even longer, you can freeze them! Just wrap each square in plastic wrap and pop them in a freezer-safe bag. They’ll hold up well for about 1 to 2 months. When you’re ready to enjoy, just thaw them in the fridge overnight. Easy peasy!
So, whether you’re prepping for a festive gathering or just treating yourself, these storage tips will ensure you enjoy your no-bake Christmas desserts to the fullest!
FAQ Section
Can I make these desserts ahead of time?
Absolutely! In fact, making these no-bake Christmas desserts ahead of time is one of the best things about them. You can prepare them a day or two in advance and let them chill in the fridge. This way, they’ll be perfectly set and ready to serve when your holiday gathering rolls around. Just remember to cover them well to keep them fresh!
What variations can I try with this recipe?
Oh, the possibilities are endless! Here are a few fun ideas to switch things up:
- Nutty Delight: Add chopped nuts like walnuts or pecans for a crunchy texture.
- Fruit Twist: Mix in some dried fruits like cranberries or raisins for a pop of flavor.
- Chocolate Overload: Swap the standard chocolate chips for white chocolate or even peanut butter chips!
- Seasonal Flavors: Try adding a pinch of cinnamon or nutmeg for a warm, holiday spice.
- Different Candies: Replace the crushed peppermint with crushed Oreos or M&M’s for a festive flair.
Feel free to get creative and make this recipe your own!
How long do these desserts last?
When stored properly in an airtight container, these no-bake Christmas desserts can last for about up to a week in the refrigerator. If you decide to freeze them, they’ll hold up well for 1 to 2 months. Just make sure to wrap each square tightly in plastic wrap before freezing. When you’re ready to enjoy them, thaw them in the fridge overnight. You’ll have a delightful treat waiting for you!