

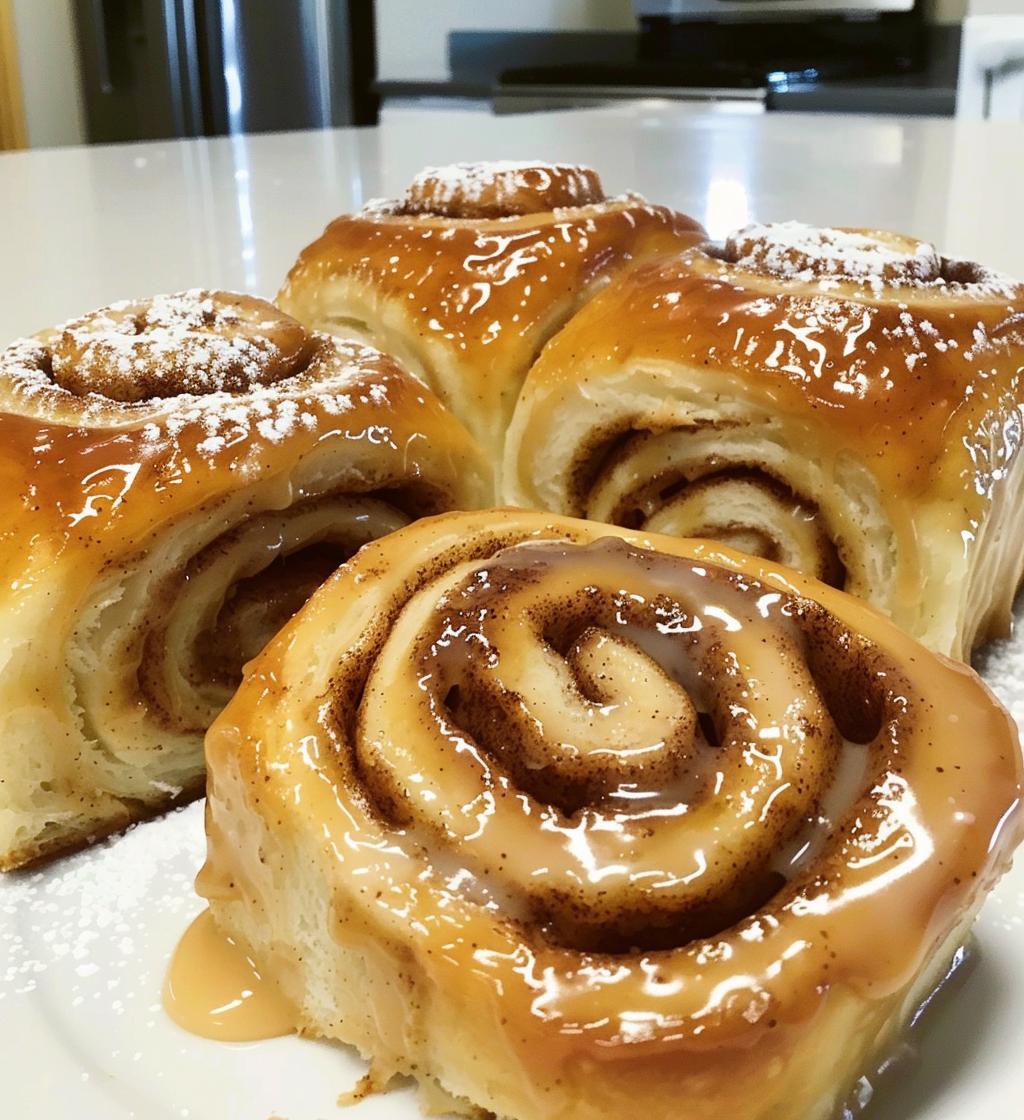
There’s just something magical about the holiday season, isn’t there? And let me tell you, these eggnog cinnamon rolls bring all the festive cheer right into your kitchen! I remember the first time I made them; it was a chilly December morning, and the smell of warm spices and sweet eggnog filled the air. It felt like a hug from the inside! These rolls are soft, fluffy, and drizzled with a sweet glaze that makes them impossible to resist. Whether you’re hosting a holiday brunch or just treating yourself to a cozy breakfast, these eggnog cinnamon rolls are the perfect indulgence. Trust me, once you try them, they’re bound to become a beloved tradition in your home, just like they are in mine!
Ingredients List
Alright, let’s gather everything we need to make these delightful eggnog cinnamon rolls! Here’s what you’ll need:
- 2 cups all-purpose flour
- 1/2 cup sugar
- 1/2 cup eggnog
- 1/4 cup butter, melted
- 1 large egg
- 1 packet active dry yeast
- 1 teaspoon ground cinnamon
- 1/2 teaspoon nutmeg
- 1/4 teaspoon salt
- 1 cup powdered sugar
- 2 tablespoons milk
- 1 teaspoon vanilla extract
Make sure you have everything ready to go before you start—trust me, it makes the process so much smoother and way more fun!
How to Prepare Eggnog Cinnamon Rolls
Alright, let’s dive into the delicious process of making these eggnog cinnamon rolls! Follow these steps, and you’ll have a warm, festive treat that fills your home with the most delightful aroma. I promise, it’s worth every minute!
Step 1: Activate the Yeast
First things first, we need to wake up our yeast! In a bowl, combine the warm eggnog and the packet of active dry yeast. Let it sit for about 5 minutes. This is super important because it allows the yeast to activate and get bubbly. You’ll know it’s ready when it starts to foam a bit. That’s the magic of baking!
Step 2: Mix Wet Ingredients
Next up, we’re adding some flavor! To that bubbly yeast mixture, add the melted butter, sugar, egg, and spices (don’t forget the cinnamon and nutmeg!). Mix everything together really well until it’s all combined. Trust me, this is where the holiday spirit starts to shine through!
Step 3: Combine Dry Ingredients
Now it’s time to bring in the flour! Gradually add the all-purpose flour and salt into the wet mixture. I like to do this in batches to keep things nice and smooth. Once everything is combined, it’s kneading time! Get your hands in there and knead the dough for about 5-7 minutes until it feels soft and elastic. It should be a little sticky, but that’s just right!
Step 4: First Rise
Alright, let’s give our dough a well-deserved rest. Place it in a lightly greased bowl, cover it with a clean towel, and let it rise in a warm place for about 1 hour. You’ll want to look for it to double in size. This is the part where the dough gets fluffy and airy—so exciting!
Step 5: Prepare the Filling
Once your dough has risen, it’s time to roll it out! On a floured surface, roll the dough into a rectangle about 1/4 inch thick. Then, spread a generous layer of softened butter over the top, followed by a sprinkle of sugar and a good dusting of cinnamon. Oh, the smell is heavenly!
Step 6: Shape the Rolls
Now, roll the dough tightly from one end to the other, forming a nice log. Once you have it all rolled up, use a sharp knife to cut it into 12 equal rolls. Gently place each roll into a greased baking dish, making sure they’re snug but not squished. They’ll expand more, so give them a little room to breathe!
Step 7: Second Rise
Cover the rolls with a towel again and let them rise for another 30 minutes. This second rise is key to getting those fluffy, pillowy rolls. Just imagine how amazing they’ll taste fresh out of the oven!
Step 8: Bake
Preheat your oven to 350°F (175°C) while the rolls are rising. Once they’re ready, pop them in the oven for about 25 minutes or until they’re golden brown on top. Your kitchen will smell incredible—get ready for the compliments!
Step 9: Make the Glaze
While the rolls are baking, let’s whip up that sweet glaze! In a bowl, mix together the powdered sugar, milk, and vanilla extract until smooth and creamy. You want it to be thick enough to drizzle but not too runny.
Step 10: Serve
Once the rolls are out of the oven and slightly cooled, it’s time for the best part—drizzling the glaze over those warm rolls! Don’t be shy; let it cascade down the sides. Serve them up warm and watch everyone’s faces light up with joy. Enjoy every gooey, sweet bite!
Why You’ll Love This Recipe
- Quick preparation: You can whip these up in no time, making them perfect for those busy holiday mornings.
- Festive flavor: The combination of eggnog, cinnamon, and nutmeg brings all the holiday vibes to your kitchen.
- Easy to follow: Each step is straightforward, so even if you’re a novice baker, you’ll feel like a pro!
- Perfect for holiday gatherings: These rolls are a crowd-pleaser, making them great for brunches, parties, or cozy family breakfasts.
- Warm and comforting: There’s nothing like a freshly baked cinnamon roll to warm your heart and home during the chilly season.
- Customizable: Feel free to adjust the spices or add your favorite mix-ins for a personal touch!
Tips for Success
Alright, friends! Here are some of my top tips to ensure your eggnog cinnamon rolls turn out absolutely perfect. Trust me, a little attention to detail goes a long way!
- Adjust the spices: If you love a strong flavor, feel free to up the cinnamon or nutmeg a bit! You can even add a pinch of allspice for extra warmth. Just remember, it’s all about your taste preferences!
- Check your yeast: Always make sure your yeast is fresh. If it doesn’t foam in the warm eggnog, it’s probably past its prime, and your rolls won’t rise as well.
- Don’t skip the rising times: Give your dough the time it needs to rise! If your kitchen is a bit chilly, try placing the bowl in a warm spot or even in the oven (turned off, of course) to help it along.
- Flour your surface generously: When rolling out your dough, be sure to flour your surface liberally to prevent sticking. Nobody wants a dough disaster on their hands!
- Keep an eye on baking: Ovens can be sneaky! Start checking your rolls a couple of minutes before the timer goes off. You want them golden brown but not overdone—trust your nose, it’ll tell you!
- Let them cool slightly: I know it’s hard to resist the warm, gooey rolls, but letting them cool for a few minutes before glazing allows the glaze to set beautifully and not just run off!
With these tips, you’ll be on your way to making the most delightful eggnog cinnamon rolls ever! Enjoy the baking adventure!
Storage & Reheating Instructions
So, you’ve made these delicious eggnog cinnamon rolls, and now you’ve got some leftovers (if that ever happens!). No worries—I’ve got you covered on how to store and reheat them so they stay just as scrumptious as when they came out of the oven!
To store your rolls, simply place them in an airtight container. This will keep them fresh and prevent them from drying out. They’ll last in the fridge for about 3 to 5 days, but trust me, they won’t last that long if you have friends or family around!
When it’s time to enjoy those leftover rolls, you can easily reheat them in the microwave. Just pop one in for about 10-15 seconds, and it’ll be warm and gooey again—just the way you want it! If you prefer a slightly crispier texture, you can also reheat them in the oven at 350°F (175°C) for about 5-7 minutes. This way, the edges get a little toasty, and the inside stays soft and delightful.
Now, if you want to really elevate your breakfast experience, you can drizzle a little extra glaze on top before serving. Yum! Enjoy every last bite of these festive treats!
Nutritional Information
Alright, let’s talk numbers! Here’s the typical nutritional breakdown for one of these delicious eggnog cinnamon rolls. Keep in mind that these values are estimates and can vary based on the specific ingredients you use and how generous you are with that glaze!
- Calories: 250
- Fat: 8g
- Saturated Fat: 4g
- Trans Fat: 0g
- Cholesterol: 30mg
- Sodium: 150mg
- Carbohydrates: 38g
- Fiber: 1g
- Sugar: 12g
- Protein: 4g
Enjoy the festive flavors without too much guilt—after all, it’s the holidays! These rolls are the perfect treat to savor, especially when shared with loved ones.
FAQ Section
Can I use store-bought eggnog for this recipe?
Absolutely! Store-bought eggnog works perfectly and saves you some time. Just make sure it’s a good quality brand for the best flavor.
What can I substitute for eggnog if I don’t have any?
If you find yourself without eggnog, you can make a quick substitute by mixing equal parts milk and heavy cream with a splash of vanilla and a pinch of nutmeg. It won’t be exactly the same, but it’ll still create a delicious roll!
Can I make these rolls ahead of time?
Yes! You can prepare the rolls up to the second rise, cover them tightly, and refrigerate them overnight. Just let them come to room temperature and rise for about 30 minutes before baking. This way, you can enjoy fresh rolls in the morning without all the fuss!
How do I know when the cinnamon rolls are done baking?
Your eggnog cinnamon rolls are ready when they’re golden brown on top and a toothpick inserted in the center comes out clean. You’ll also want to keep an eye on that delightful aroma filling your kitchen—it’s a sure sign they’re almost done!
Can I freeze the unbaked rolls?
Yes, you can! Just prepare the rolls, cut them, and place them on a baking sheet to freeze until solid. Then transfer them to a freezer-safe bag. When you’re ready to bake, let them thaw in the refrigerator overnight and follow the second rise before baking. Easy peasy!