

Oh, the magic of *Christmas baking*! There’s something truly special about this time of year that makes the kitchen feel warm and inviting, filled with the sweet scents of holiday treats. I just love gathering my family around the kitchen, flour dusting our noses, as we whip up batches of cookies that have become our cherished traditions. One of my all-time favorite memories is when my grandma and I would bake together, her old recipe book open on the counter, and we’d laugh as we tried to sneak a few chocolate chips before they even made it into the dough! It’s these simple moments, filled with love and laughter, that make holiday baking so meaningful. Trust me, when you start creating your own festive treats, you’ll find that it brings everyone together—sharing stories, tasting, and making memories that last a lifetime. So, let’s roll up our sleeves and dive into these delightful cookies that will surely become a part of your own holiday tradition!
Ingredients List
Before we start baking, let’s gather our ingredients! Having everything ready makes the process so much smoother and way more enjoyable. Here’s what you’ll need for these festive cookies:
- 2 cups all-purpose flour – This is the base for our cookies, giving them that lovely structure.
- 1 cup granulated sugar – Sweetness is key, and this will help our cookies get that perfect golden color!
- 1/2 cup unsalted butter (softened) – Make sure it’s nice and soft; it’ll cream beautifully with the sugar!
- 1 large egg – This will help bind everything together and add a touch of richness.
- 1 teaspoon vanilla extract – Trust me, this is what adds that delightful flavor that everyone loves!
- 1 teaspoon baking powder – This is our leavening agent, helping the cookies rise just right.
- 1/2 teaspoon salt – A little salt goes a long way in enhancing all those sweet flavors.
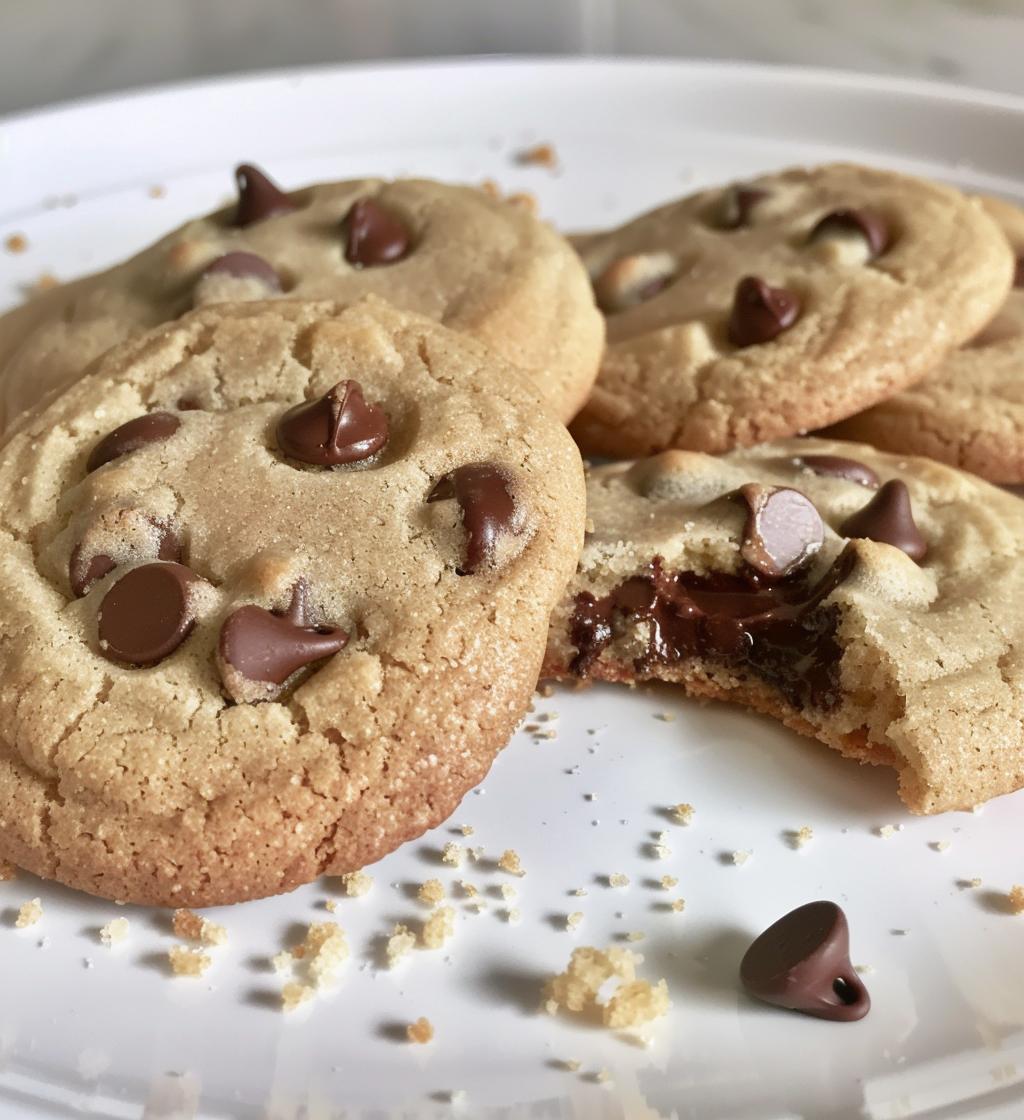
- 1 cup chocolate chips – Can you smell that? This is the star of the show, adding gooey, melty goodness!
Now that we have everything lined up, it’s time to bring some holiday cheer into the kitchen!
How to Prepare Instructions
Alright, let’s get down to the fun part—baking these delightful cookies! Follow these simple steps, and you’ll be rewarded with a batch of warm, gooey goodness in no time. I promise, it’ll be worth the effort!
Step 1: Preheat the Oven
First things first, you’ll want to preheat your oven to 350°F (175°C). This is key for achieving that perfect texture, so don’t skip this step! It gives your cookies a nice golden finish.
Step 2: Cream the Butter and Sugar
In a mixing bowl, combine the softened butter and granulated sugar. Using a hand mixer or a whisk, beat them together until the mixture is smooth and creamy. You want it to be light and fluffy—this is where the magic begins!
Step 3: Mix in the Egg and Vanilla
Next up, crack in that large egg and pour in the vanilla extract. Mix everything together until it’s fully incorporated. You’ll love the aroma that fills your kitchen at this point—it’s the smell of holiday cheer!
Step 4: Combine Dry Ingredients
Now, grab another bowl and whisk together the flour, baking powder, and salt. This step is super important because it ensures that the dry ingredients are evenly distributed, which helps your cookies rise just right!
Step 5: Combine Wet and Dry Ingredients
Gradually add the dry mixture to the wet mixture, stirring gently. I like to do this in batches, so it’s easier to mix. You want a smooth blend—just be careful not to overmix, or your cookies might turn out tough!
Step 6: Fold in Chocolate Chips
Time for the star of the show! Gently fold in those chocolate chips with a spatula. You want them evenly distributed throughout the dough, but be gentle so they don’t break apart. Can you imagine how delicious this dough is already?
Step 7: Prepare the Baking Sheet
Line a baking sheet with parchment paper (or a silicone baking mat, if you have one). Using a spoon or a cookie scoop, drop spoonfuls of dough onto the sheet—about 2 inches apart to give them room to spread. Oh, the excitement is building!
Step 8: Bake the Cookies
Pop those beauties in the oven and bake for 10-12 minutes or until they’re golden around the edges. Keep an eye on them because every oven is a bit different! Trust me, you’ll want to catch them at just the right moment.
Step 9: Cooling Process
Once they’re done baking, remove the cookies from the oven and let them cool on the baking sheet for a few minutes. Then, transfer them to a wire rack to cool completely. This cooling time is crucial—it really enhances the flavor and texture. Plus, it gives you a moment to savor the delightful aroma wafting through your kitchen!
Tips for Success
Before you dive into baking, let me share some of my best tips to ensure your cookies turn out perfectly every time. Trust me, these little nuggets of wisdom can make a big difference in your holiday baking experience!
- Use Room Temperature Ingredients: Make sure your butter and egg are at room temperature before you start. This helps them blend more easily, creating that light and fluffy texture we’re after!
- Avoid Overmixing: When combining the wet and dry ingredients, mix just until everything is incorporated. Overmixing can lead to tough cookies, and we definitely want them soft and chewy!
- Check for Doneness by Color: Instead of relying solely on time, look for that beautiful golden edge. The centers might appear a bit soft, but they’ll continue to cook as they cool on the baking sheet. That’s how you get that perfect gooeyness!
- Let Them Cool: I know it’s tempting to dive right in, but allowing your cookies to cool for a few minutes on the baking sheet before transferring them to a wire rack really enhances their flavor and texture. Patience pays off!
- Experiment with Chocolate: Feel free to swap out chocolate chips for your favorites—like white chocolate, peanut butter chips, or even dried fruit! Mixing it up keeps things exciting every holiday season!
With these tips in your back pocket, you’re ready to whip up a batch of cookies that will have everyone asking for seconds. Happy baking!
Why You’ll Love This Recipe
Oh, let me tell you why this *Christmas baking* recipe is a total winner! First off, the preparation is super quick—trust me, you can have these delightful cookies ready in no time, making it perfect for those busy holiday schedules. You won’t spend hours in the kitchen; instead, you’ll be creating delicious memories with your loved ones.
And the best part? The ingredients are simple and straightforward! There’s no hunting down fancy items or complicated techniques here. Just basic pantry staples that you probably already have on hand. It’s all about keeping things easy and stress-free during the festive season!
Now, let’s talk flavor. These cookies are a delightful combination of sweetness and richness, with that scrumptious melty chocolate in every bite. Seriously, every time you take a bite, it feels like a warm hug on a cold winter day. Plus, they fill your home with that irresistible holiday aroma, creating the perfect atmosphere for gathering with family and friends.
So, whether you’re baking for a holiday party, gift-giving, or just to enjoy at home, these cookies are sure to bring smiles all around. I guarantee they’ll become a cherished part of your holiday traditions just like they are in mine!
Nutritional Information Section
Now, if you’re curious about the nutritional side of these delicious cookies, I’ve got you covered! Here’s the estimated nutritional data per cookie:
- Calories: 150
- Sugar: 10g
- Fat: 7g
- Protein: 2g
- Carbohydrates: 20g
Keep in mind that these values are estimates and can vary based on the specific ingredients you use. But hey, a little indulgence is what the holiday season is all about, right? Enjoy these treats knowing they’re made with love and joy!
FAQ Section
Can I freeze the cookie dough?
Absolutely, you can freeze the cookie dough! Just scoop out the cookie dough onto a baking sheet lined with parchment paper and freeze the balls until solid. Once they’re frozen, transfer them to an airtight container or a resealable freezer bag. When you’re ready to bake, you can pop them straight from the freezer onto a baking sheet. Just add a couple of extra minutes to the baking time, and you’ll have fresh cookies ready to enjoy anytime!
Can I substitute ingredients?
Of course! This recipe is quite forgiving when it comes to substitutions. If you don’t have unsalted butter, you can use margarine or even coconut oil for a dairy-free option. As for the chocolate chips, feel free to mix it up! You can use milk chocolate, dark chocolate, or even white chocolate. Toss in some nuts or dried fruit if you’re feeling adventurous—the possibilities are endless!
How should I store the cookies?
To keep those cookies fresh and delicious, store them in an airtight container at room temperature. They’ll stay good for about a week—though I doubt they’ll last that long! If you want to keep them for a bit longer, you can freeze the baked cookies as well. Just layer them between parchment paper in an airtight container, and they’ll be perfect for up to two months. When you’re ready to enjoy them again, simply let them thaw at room temperature. Yum!
What is the yield of this recipe?
This delightful recipe yields approximately 24 cookies, which makes it perfect for sharing with family and friends during the holidays. Whether you’re bringing them to a holiday gathering or just enjoying them at home, there’s plenty to go around. Trust me, they’ll be a hit!
Serving Suggestions
Now that you’ve baked up a batch of these delicious cookies, let’s talk about the best ways to enjoy them! Trust me, the right drink or presentation can elevate your cookie experience to a whole new level.
- Milk: You can’t go wrong with the classic pairing of warm cookies and a cold glass of milk. The rich chocolate melts into the milk and creates a delightful combo that takes you straight back to childhood!
- Hot Cocoa: For those chilly winter evenings, serve these cookies alongside a steaming cup of hot cocoa. The creamy, chocolatey goodness of the drink perfectly complements the sweetness of the cookies. And don’t forget to add a sprinkle of marshmallows on top!
- Festive Dessert Platter: Want to impress your guests? Arrange these cookies on a festive dessert platter with some holiday treats like peppermint bark, gingerbread cookies, or mini cheesecakes. It not only looks gorgeous but also gives everyone a little something to enjoy!
- Coffee or Tea: If you’re hosting a holiday gathering, a nice cup of coffee or tea pairs beautifully with these cookies. The warmth of the drink enhances the flavors, making for a cozy moment around the table.
- Gift Giving: Pack these cookies in cute holiday tins or boxes to share with friends and family. It’s a heartfelt gift that spreads holiday joy and showcases your baking skills!
So, whether you’re indulging solo or sharing with loved ones, these cookies are sure to bring smiles and warm hearts. Enjoy every delicious bite and the festive spirit they bring to your home!