

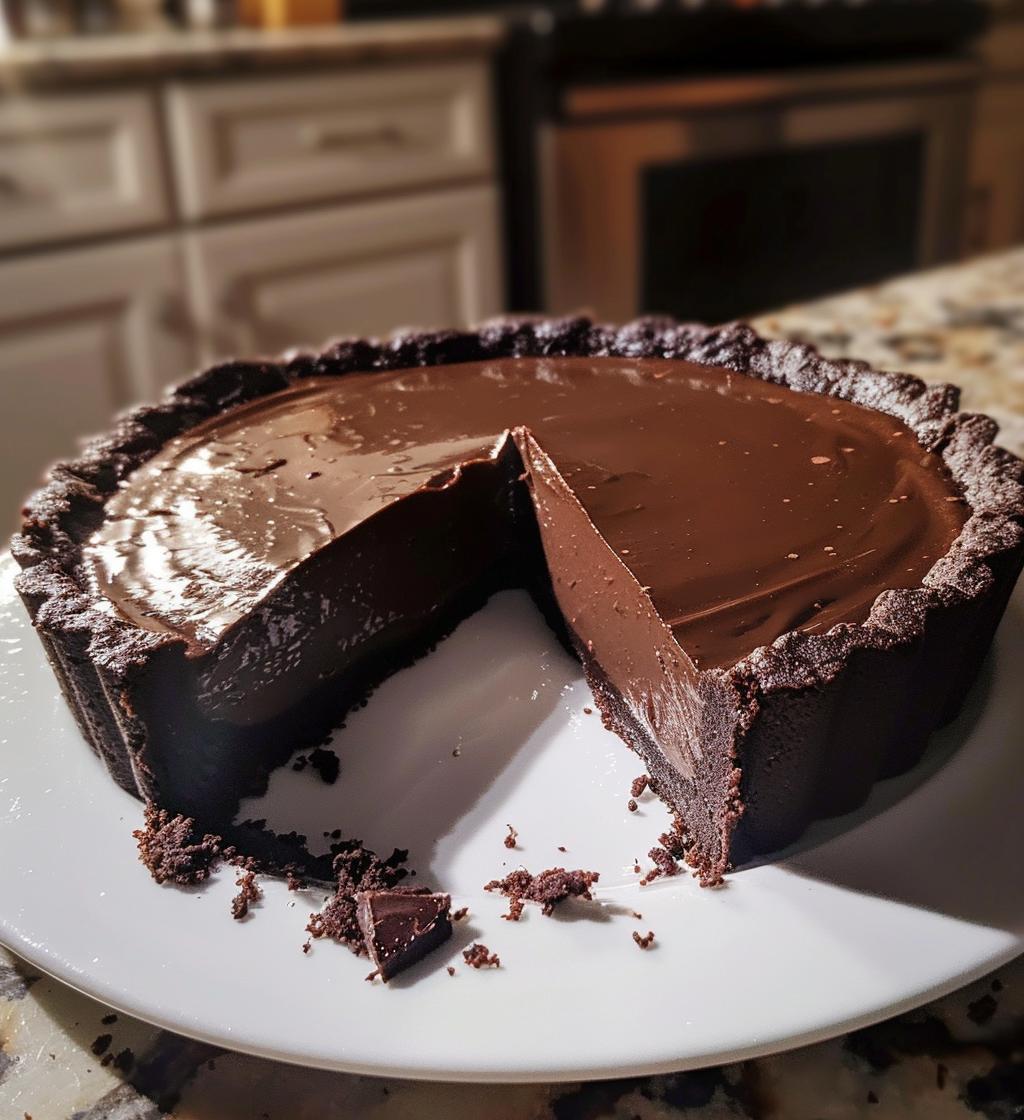
Oh, let me tell you about the magic of a Chocolate tart! This dessert is a true testament to French cuisine, with its rich, velvety filling nestled in a crisp, buttery crust that just melts in your mouth. I remember the first time I made it for a dinner party; the moment I sliced into it, the aroma of dark chocolate filled the room, and I just knew it was going to be a hit! It’s the kind of indulgence that elevates any occasion, whether it’s a fancy celebration or just a cozy night in. Trust me, once you taste it, you’ll want to share it with everyone you know!
Ingredients List
Here’s what you’ll need to whip up this delightful Chocolate tart. Gather these ingredients and let’s get started:
- 1 1/4 cups all-purpose flour – this will form the base of your crust.
- 1/2 cup unsweetened cocoa powder – for that rich chocolate flavor.
- 1/2 cup powdered sugar – to sweeten the crust just right.
- 1/2 cup unsalted butter, softened – make sure it’s at room temperature for easy mixing.
- 1/4 teaspoon salt – a little salt enhances all the flavors.
- 1 large egg yolk – this gives the crust its beautiful texture.
- 1 cup heavy cream – for a luscious filling.
- 8 oz dark chocolate, chopped – use high-quality chocolate for the best taste.
- 2 tablespoons sugar – to balance the bitterness of the chocolate.
- 1 teaspoon vanilla extract – a splash of vanilla makes everything better.
How to Prepare a Chocolate Tart
Making a Chocolate tart is a delightful experience, and I promise it’s easier than it looks! Start by preheating your oven to 350°F (175°C). First, we’ll prepare the crust. In a mixing bowl, combine the all-purpose flour, cocoa powder, powdered sugar, and salt. Then, add the softened unsalted butter and the egg yolk. Mix everything together until the dough comes together—it should be slightly crumbly but hold its shape when pressed. Now, press the dough firmly into a tart pan, making sure to cover the bottom and sides evenly. Bake it for about 15 minutes, then let it cool completely while we prepare the filling.
Preparing the Crust
To create the perfect tart crust, mix your dry ingredients—flour, cocoa powder, powdered sugar, and salt—until well combined. Then, cut in the softened butter and egg yolk. I like to use my fingers to incorporate the butter until the mixture resembles coarse crumbs. Once it’s mixed well, press the dough into your tart pan. Make sure it’s even and smooth; this is where all that luscious filling will go! Bake it for 15 minutes, and let it cool on a wire rack while you whip up that irresistible filling.
Making the Filling
Now, onto the star of the show—our chocolate filling! In a saucepan, heat the heavy cream and sugar over medium heat until it’s just about to simmer; you’ll see those tiny bubbles forming. Remove it from the heat and add the chopped dark chocolate and vanilla extract. Stir it gently until the chocolate is completely melted and smooth—this is where you’ll want to use high-quality chocolate for that rich flavor! Pour the filling into the cooled crust, smoothing it out for a lovely finish. Refrigerate for at least 2 hours to let it set, and then get ready to indulge!
Why You’ll Love This Recipe
- Decadently rich chocolate flavor that satisfies any sweet tooth.
- Simple preparation with straightforward steps—perfect for beginners!
- Versatile dessert for any occasion, from dinner parties to cozy nights in.
- Elegant presentation that makes you look like a pro in the kitchen.
- Leftovers (if there are any!) taste just as divine the next day.
Tips for Success
To ensure your Chocolate tart turns out perfectly, here are some of my top tips! First, always use high-quality chocolate; it truly makes a difference in flavor. Don’t skip the chilling time after pouring in the filling—this helps it set properly. When pressing the crust into the pan, be sure to do it evenly to avoid any cracks. As for serving, I love to top slices with a dollop of whipped cream or fresh berries for a pop of color and flavor. And remember, a warm cup of coffee pairs beautifully with this indulgent dessert!
Variations for Your Chocolate Tart
If you’re feeling adventurous, there are so many fun ways to mix things up with your Chocolate tart! For a citrusy twist, try adding a teaspoon of orange zest to the filling—it brightens the flavor beautifully. You can also switch up the chocolate; using milk chocolate instead of dark will give you a sweeter, creamier filling. Feeling nutty? Mix in some chopped hazelnuts or almonds for added crunch. And if you want to get a little fancy, drizzle a homemade raspberry sauce on top before serving. Each variation brings its own charm to this already delicious dessert!
Nutritional Information
Just a heads up, the nutritional values can vary based on the specific brands and ingredients you use, so they’re not set in stone. Typically, one slice of this Chocolate tart has around 350 calories, with about 25g of sugar and 25g of fat. It’s rich and indulgent, so enjoy it in moderation! Always a good idea to check your ingredient labels for precise information.
Storage & Reheating Instructions
To keep your Chocolate tart fresh and delicious, store it in an airtight container in the refrigerator. It’ll stay good for about 3-4 days—if it lasts that long! If you find yourself with leftovers (lucky you!), make sure to slice it first before storing to make it easier to grab a piece later. No need to reheat; this tart is best served chilled, but if you prefer it a little warmer, pop a slice in the microwave for just a few seconds—careful not to overdo it! Enjoy every decadent bite!
FAQ Section
Got questions about making the perfect Chocolate tart? I’ve got you covered! First off, to prevent a soggy crust, make sure to bake it until it’s firm and let it cool completely before adding the filling. This helps keep everything nice and crisp! Now, how do you know when the filling is set? It should be slightly firm to the touch and not jiggle too much when you gently shake the pan. And yes, you can absolutely make this tart ahead of time! In fact, it’s a great make-ahead dessert; just store it in the fridge for up to 3-4 days. This way, you can focus on enjoying your company instead of slaving away in the kitchen last minute!
For more delicious recipes, check out our all recipes page!