

There’s something truly magical about making festive treats during the holiday season, and my all-time favorite has to be Chocolate peppermint bark. The combination of smooth chocolate and refreshing peppermint just feels like a celebration in every bite! I remember the first time I made this with my grandmother; her kitchen was filled with the warm aroma of melted chocolate and laughter. We would break the bark into pieces and package them up as gifts for friends and family. It’s a tradition I cherish and one that brings everyone together, making it the perfect sweet treat for sharing and savoring during the holidays!
Ingredients
- 12 oz dark chocolate, chopped
- 12 oz white chocolate, chopped
- 1 tsp peppermint extract
- 1/2 cup crushed peppermint candies
How to Prepare Chocolate Peppermint Bark
Alright, let’s dive into the delightful process of making your very own Chocolate peppermint bark! Trust me, it’s super simple and oh-so-rewarding. Just follow these easy steps, and you’ll have a festive treat that’ll impress everyone!
Step 1: Melt the Dark Chocolate
First things first, we need to melt that luscious dark chocolate. I like to use a double boiler for this—just fill a pot with a couple of inches of water and bring it to a gentle simmer. Place a heat-proof bowl on top, making sure it doesn’t touch the water. Add the chopped dark chocolate and stir occasionally until it’s completely melted and smooth. Be careful; you don’t want it to burn or clump! If you notice it starting to thicken too much, just take it off the heat and keep stirring until it’s silky.
Step 2: Spread the Dark Chocolate
Once your dark chocolate is melted, grab a parchment-lined baking sheet. Pour the smooth chocolate onto it and use a spatula to spread it out evenly. Make sure you cover the entire sheet, creating a nice layer that’s about 1/4 inch thick. This is where the magic begins, so take your time to make it look good!
Step 3: Chill the Dark Chocolate
Now, pop that baking sheet into the refrigerator and let it chill until set, which takes about 30 minutes. To check if it’s ready, gently touch the surface—it should feel firm and not stick to your finger. If it’s still soft, give it a few more minutes.
Step 4: Prepare the White Chocolate
While the dark chocolate is chilling, let’s melt the white chocolate! Use the same double boiler method as before. Once it’s melted, remove it from the heat and stir in the peppermint extract. Oh, the smell is heavenly! This will give your bark that refreshing kick!
Step 5: Layer the White Chocolate
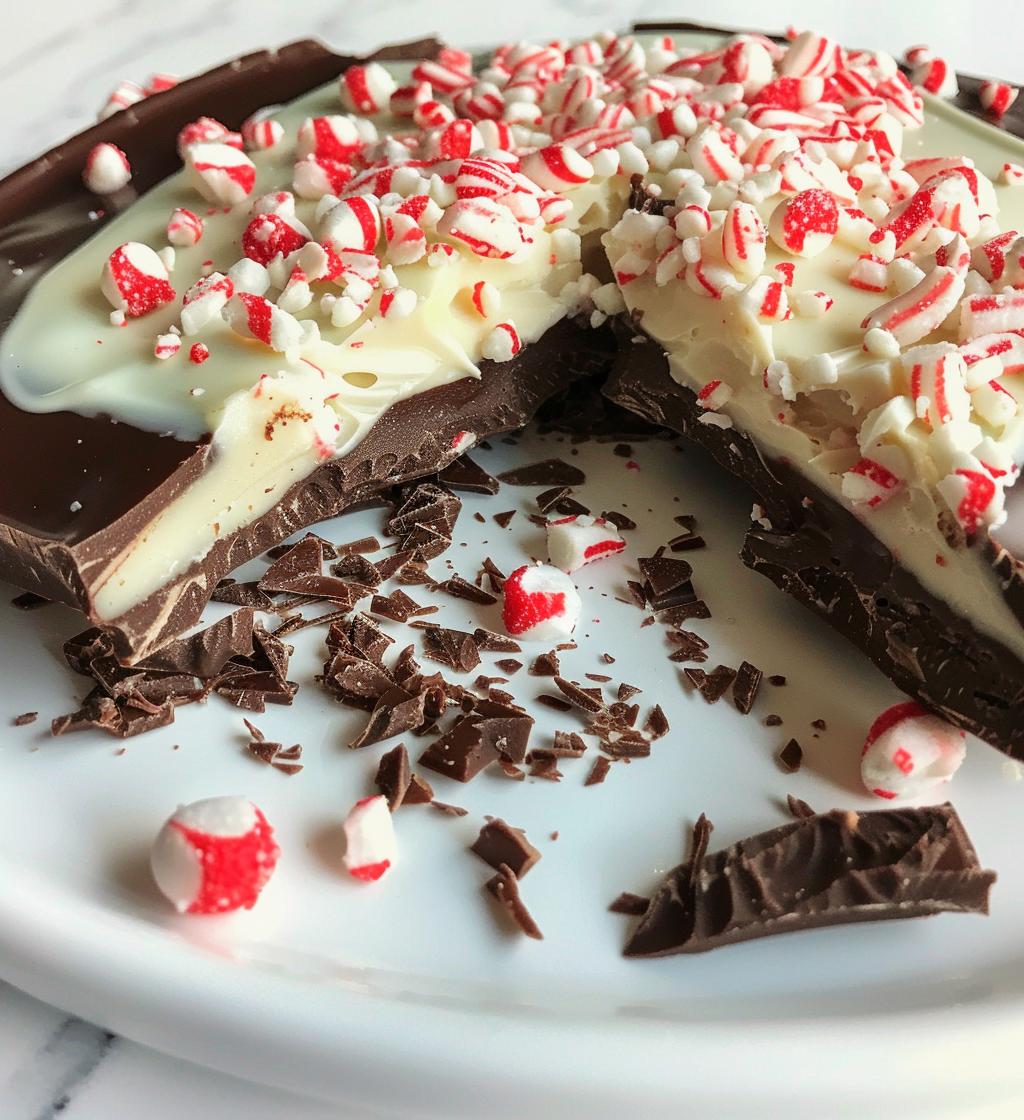
Now it’s time to layer the white chocolate over the chilled dark chocolate. Pour the melted white chocolate right on top and use your spatula to spread it evenly, covering the dark layer completely. You want to create that beautiful contrast of colors!
Step 6: Add Crushed Peppermint Candies
Before the white chocolate sets, sprinkle the crushed peppermint candies on top. This not only adds a pop of color but also gives that delightful crunch and festive look. Press them down gently so they stick!
Step 7: Final Chill
Back to the fridge it goes! Let your bark chill for about 1 hour until everything is fully set. You’ll know it’s ready when it feels firm to the touch. Patience is key here, but trust me, it’s worth the wait!
Step 8: Serve and Enjoy
Once your bark is set, take it out and let it sit at room temperature for a few minutes. Then, break it into pieces with your hands or a knife, and serve it up! You can even package some as gifts—just make sure to keep some for yourself because you’ll definitely want to indulge!
Tips for Success
Alright, let’s make sure your Chocolate peppermint bark turns out perfectly! First off, always use high-quality chocolate; it makes a world of difference in flavor and texture. I love using chocolate that’s at least 60% cocoa for the dark layer—it gives that rich, deep taste that pairs wonderfully with the sweet white chocolate.
Also, don’t skip the peppermint extract; it really elevates the whole experience! If you want an extra festive touch, crush some candy canes instead of peppermint candies. They not only look great but also add a delightful crunch and a burst of minty flavor. And remember, patience is key—let each layer chill fully before adding the next. This will help keep your bark from mixing together and maintain those beautiful layers. You’ve got this!
Nutritional Information
Let’s talk numbers! Each piece of this delightful Chocolate peppermint bark packs a tasty punch while still being a treat you can enjoy without too much guilt. Here’s the estimated nutritional breakdown per serving (1 piece):
- Calories: 150
- Fat: 8g
- Saturated Fat: 5g
- Unsaturated Fat: 2g
- Trans Fat: 0g
- Cholesterol: 0mg
- Sodium: 10mg
- Sugar: 12g
- Carbohydrates: 18g
- Fiber: 1g
- Protein: 2g
Keep in mind, these are estimates based on typical values, so your results may vary a bit depending on the specific ingredients you use. But regardless, you’re in for a delicious treat that’s perfect for holiday snacking or gifting!
FAQ Section
Got questions about Chocolate peppermint bark? No worries, I’ve got you covered! One of the most common questions is, How do I store it? Just keep your bark in an airtight container at room temperature for up to two weeks. If it’s really warm out, you might want to refrigerate it to keep it nice and firm.
Another question I often get is, Can I use different types of chocolate? Absolutely! Feel free to experiment with milk chocolate or even white chocolate for the bottom layer. And if you’re looking for a twist, try adding some crushed nuts or dried fruit for added texture!
Finally, Can I make this ahead of time? Yes, you can! It’s a fantastic make-ahead treat, perfect for gifting or holiday parties. Just remember to let it set completely before storing it. Enjoy making this festive delight!
Why You’ll Love This Recipe
- It’s incredibly quick and easy to make—perfect for last-minute holiday treats!
- The combination of rich chocolate and refreshing peppermint is simply irresistible.
- It’s a festive addition to any dessert table, bringing that holiday cheer!
- With its beautiful layers, it makes a stunning gift for friends and family.
- You can customize it with different toppings or chocolate types to suit your taste.
- This no-bake recipe means you don’t have to worry about the oven—just melt and chill!
Storage & Reheating Instructions
To keep your delicious Chocolate peppermint bark fresh, store it in an airtight container at room temperature. It should last for up to two weeks, but trust me, it probably won’t last that long because it’s just too good! If you live in a warmer climate, consider popping it in the fridge to prevent it from becoming too soft.
As for reheating, you really don’t need to! This treat is best enjoyed chilled or at room temperature. If you find it’s become a bit too soft, just let it sit in the fridge for a little while before serving. Enjoy every minty, chocolatey bite!