

Oh my goodness, let me tell you about these Cheesy Garlic Breadsticks! They’re the kind of snack that makes your heart sing—warm, gooey, and oh-so-satisfying. Picture this: you’re having friends over for a game night or just a cozy movie marathon, and the aroma of freshly baked breadsticks fills the air. I can’t resist pulling them straight from the oven, slathering on a bit of butter, and watching everyone’s eyes light up as they take their first bite. Trust me, these breadsticks are perfect for sharing (or not, no judgment here!). They come together so easily, and once you make them, you’ll be requested to whip them up again and again. So, let’s dive into making your new favorite snack!
Ingredients for Cheesy Garlic Breadsticks
(Tip: You’ll find the full list of ingredients and measurements in the recipe card below.)
- 2 cups bread flour (this gives the breadsticks that perfect chewy texture)
- 1 cup warm water (about 110°F or 43°C, warm to the touch but not too hot)
- 1 packet active dry yeast (that’s about 2 ¼ teaspoons, trust me, it makes the dough rise beautifully)
- 1 teaspoon sugar (this helps activate the yeast and adds a hint of sweetness)
- 1 teaspoon salt (for flavor, don’t skip this!)
- 2 tablespoons olive oil (adds richness and helps keep the breadsticks moist)
- 2 cups shredded mozzarella cheese (the more, the merrier—this is where the cheesy goodness comes from!)
- 2 tablespoons minced garlic (for that irresistible garlic kick)
- 1 tablespoon dried parsley (adds a pop of color and a bit of freshness)
How to Prepare Cheesy Garlic Breadsticks
Alright, let’s get our hands a little floury and whip up these Cheesy Garlic Breadsticks! Trust me, the process is super straightforward, and the end result is absolutely worth it. Are you ready? Let’s go!
Step 1: Prepare the Dough
First things first, grab a mixing bowl and let’s get that yeast party started! In a bowl, combine 1 cup of warm water (about 110°F or 43°C) with 1 teaspoon of sugar and the packet of active dry yeast. Give it a gentle stir and let it sit for about 5 minutes until it’s frothy. This is how you know the yeast is alive and ready to work its magic. Next, add in 2 cups of bread flour, 1 teaspoon of salt, and 2 tablespoons of olive oil. Now, it’s time to knead! Turn the mixture out onto a floured surface and knead for about 5 minutes until the dough is smooth and elastic. You want it to feel soft but not sticky—perfectly kneadable!
Step 2: Let the Dough Rise
Now that your dough is kneaded, it’s time for a little beauty rest! Place the dough in a lightly oiled bowl, cover it with a clean kitchen towel, and let it rise in a warm spot for about 30 minutes. I like to put it in my oven (turned off, of course) because it’s cozy in there. You’ll know it’s ready when it’s doubled in size—oh, it’s such a satisfying sight!
Step 3: Shape the Breadsticks
Once your dough has risen beautifully, it’s time to shape those glorious breadsticks! Lightly flour your work surface and roll out the dough into a rectangle—aim for about a half-inch thickness. It doesn’t have to be perfect, but uniform thickness is key for even baking. Now, spread the minced garlic evenly over the dough and sprinkle that glorious mozzarella cheese all over! Be generous; this is where the cheesy magic happens. Then, cut the dough into sticks—about 1 inch wide works great—using a sharp knife or pizza cutter. Place them on a baking sheet lined with parchment paper, and let them rest for a few minutes while the oven heats up.
Step 4: Bake the Breadsticks
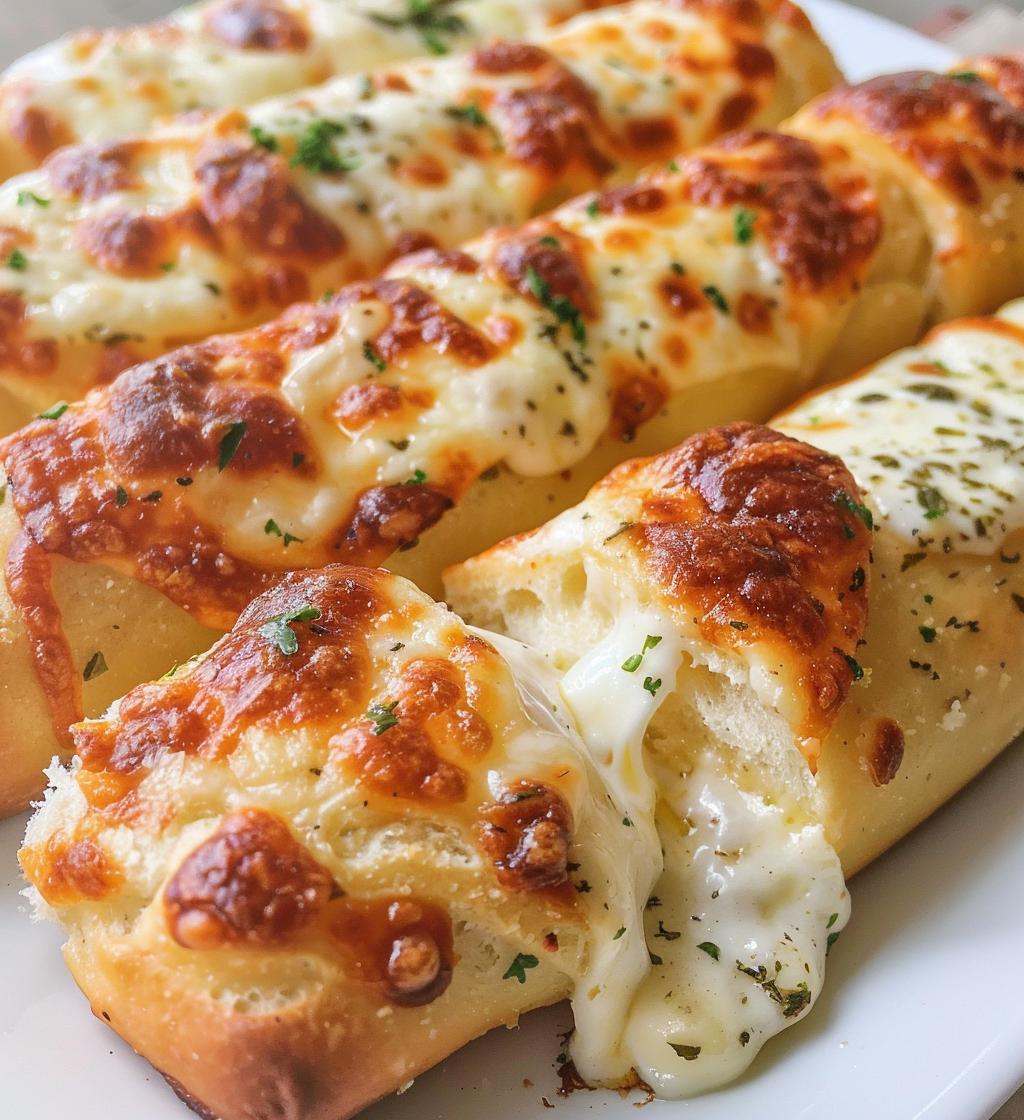
Preheat your oven to 400°F (200°C). Once it’s nice and hot, pop those breadsticks in for about 15-20 minutes. You’ll want to keep an eye on them—they should turn golden brown and look incredibly inviting. When they’re done, the cheese will be bubbly and the edges will be crispy. Oh, the smell is heavenly! Just before serving, sprinkle them with some dried parsley for that beautiful touch. Serve warm and watch them disappear!
Why You’ll Love This Recipe
- Quick preparation time: You can have these cheesy delights ready in under an hour!
- Delicious flavor: The combination of garlic and gooey mozzarella is simply irresistible.
- Perfect for gatherings: Everyone loves them, making them a crowd-pleaser at parties and family get-togethers.
- Vegetarian-friendly: A delightful snack that everyone can enjoy, no meat required!
Tips for Success with Cheesy Garlic Breadsticks
Ready to level up your Cheesy Garlic Breadsticks? I’ve got some tips that will make them even more delicious and help you achieve that perfect texture. Trust me, these little nuggets of wisdom have saved my breadsticks more than once!
- Use fresh yeast: If you can, opt for fresh yeast instead of active dry. It can elevate the flavor and texture of your breadsticks!
- Adjust the garlic: If you love garlic (who doesn’t?), feel free to add a bit more than the recipe calls for. Just make sure to balance it out with the cheese so it doesn’t overpower.
- Experiment with cheeses: While mozzarella is the classic choice, try mixing in some parmesan or cheddar for an extra flavor boost. A blend of cheeses can create a delightful depth!
- Don’t skimp on the olive oil: Brushing a little olive oil on top before baking can give your breadsticks a beautiful golden color and a lovely crispy crust.
- Keep an eye on the baking time: Every oven is different! Start checking around the 15-minute mark to ensure they don’t over-bake. You want them golden, not dark brown!
- Let them cool slightly: I know it’s tempting to dig in right away, but letting them cool for just a couple of minutes will help the cheese set a bit, making them easier to handle and eat.
- Customize your herbs: Feel free to play around with herbs! Adding some Italian seasoning or fresh basil can elevate these breadsticks to gourmet status!
With these tips up your sleeve, you’re all set to make the best Cheesy Garlic Breadsticks ever. Have fun with it and let your creativity shine in the kitchen!
Nutritional Information for Cheesy Garlic Breadsticks
Alright, let’s talk about the deliciousness in numbers! Here’s the typical nutritional breakdown for one of these Cheesy Garlic Breadsticks. Keep in mind that these values are estimates based on the ingredients used, but they should give you a good idea of what to expect:
- Calories: 150
- Fat: 6g
- Saturated Fat: 3g
- Unsaturated Fat: 2g
- Trans Fat: 0g
- Cholesterol: 15mg
- Sodium: 200mg
- Carbohydrates: 20g
- Fiber: 1g
- Sugar: 1g
- Protein: 6g
These breadsticks are not just a tasty treat but also a great way to enjoy a satisfying snack without going overboard. So, go ahead and indulge a little—your taste buds will thank you!
FAQ About Cheesy Garlic Breadsticks
Got questions about these Cheesy Garlic Breadsticks? Don’t worry, I’ve got you covered! Here are some of the most common queries I get, along with the answers to help you out.
Can I use all-purpose flour instead of bread flour?
Absolutely! While bread flour gives that perfect chewy texture, all-purpose flour will work just fine. Your breadsticks will still be delicious; they just might be a tad softer.
What can I substitute for garlic?
If garlic’s not your thing, you can try using garlic powder or even other seasonings like onion powder for a different flavor profile. Just keep in mind that the taste will be different!
How do I store leftovers?
To keep your breadsticks fresh, store them in an airtight container at room temperature for up to 2 days. If you want to keep them longer, you can refrigerate them for about a week.
Can I freeze Cheesy Garlic Breadsticks?
Yes! These breadsticks freeze beautifully. Just wrap them tightly in plastic wrap and place them in a freezer bag. They’ll be good for up to 2 months. When you’re ready to eat, just thaw them at room temperature and warm them in the oven for a few minutes.
Can I customize the cheese?
Definitely! While mozzarella is classic, you can mix in or swap with other cheeses like cheddar, gouda, or even feta for a fun twist. Get creative with your cheese combinations!
What if my dough doesn’t rise?
If your dough isn’t rising, it might be that the yeast is old or the water was too hot or too cold. Make sure the water is warm to the touch (about 110°F or 43°C) and check the expiration date on your yeast. Don’t lose hope—just try again!
How can I make these gluten-free?
You can use a gluten-free flour blend that’s suitable for baking. Just make sure it contains a binding agent like xanthan gum to help the dough hold together. The flavor may vary slightly, but they’ll still be tasty!
Feel free to reach out with any more questions. I’m here to help you create the best Cheesy Garlic Breadsticks ever!
Storage & Reheating Instructions
Let’s talk about keeping those Cheesy Garlic Breadsticks fresh and ready for whenever you crave a tasty snack! Proper storage is key, so you can enjoy them just as much the next day (or even later!).
Once your breadsticks have cooled completely, I recommend placing them in an airtight container. This keeps them nice and soft! You can store them at room temperature for up to 2 days. If you want them to last longer, pop them in the fridge, where they’ll stay good for about a week. Just make sure they’re sealed well to prevent them from drying out.
Now, if you have any leftovers (though I doubt it!), you can freeze them too! Wrap each breadstick individually in plastic wrap and then place them in a freezer bag. They’ll keep well for up to 2 months. When you’re ready to indulge again, just take them out and let them thaw at room temperature.
To reheat, preheat your oven to 350°F (175°C). Place the breadsticks on a baking sheet and warm them up for about 5-10 minutes, or until they’re heated through and the cheese is all melty again. You can also pop them in the microwave for about 15-20 seconds for a quick fix, but just keep in mind that they might not get that lovely crispy exterior back.
And there you have it! Simple storage and reheating tips to keep your Cheesy Garlic Breadsticks delicious and ready to enjoy any time! Happy snacking!
Print
Cheesy Garlic Breadsticks: 7 Steps to Irresistible Bliss
- Prep Time: 30 minutes
- Cook Time: 20 minutes
- Total Time: 50 minutes
- Yield: 12 breadsticks 1x
- Category: Appetizer
- Method: Baking
- Cuisine: Italian
- Diet: Vegetarian
Description
Delicious cheesy garlic breadsticks perfect for snacking.
Ingredients
- 2 cups bread flour
- 1 cup warm water
- 1 packet active dry yeast
- 1 teaspoon sugar
- 1 teaspoon salt
- 2 tablespoons olive oil
- 2 cups shredded mozzarella cheese
- 2 tablespoons minced garlic
- 1 tablespoon dried parsley
Instructions
- Preheat your oven to 400°F (200°C).
- In a bowl, mix warm water, sugar, and yeast. Let it sit for 5 minutes.
- Add flour, salt, and olive oil. Knead until smooth.
- Let the dough rise for 30 minutes in a warm place.
- Roll out the dough into a rectangle on a floured surface.
- Spread minced garlic and sprinkle cheese over the dough.
- Cut into sticks and place on a baking sheet.
- Bake for 15-20 minutes until golden brown.
- Sprinkle with parsley before serving.
Notes
- Serve warm for best flavor.
- Try adding different herbs for variety.
Nutrition
- Serving Size: 1 breadstick
- Calories: 150
- Sugar: 1g
- Sodium: 200mg
- Fat: 6g
- Saturated Fat: 3g
- Unsaturated Fat: 2g
- Trans Fat: 0g
- Carbohydrates: 20g
- Fiber: 1g
- Protein: 6g
- Cholesterol: 15mg
Keywords: Cheesy Garlic Breadsticks