

Oh my goodness, let me tell you about my absolute favorite chicken dish—Caramelized Onion Chicken! It’s a delightful combination of savory, juicy chicken and sweet, meltingly tender caramelized onions that just elevate the whole experience. I remember the first time I made it; my kitchen filled with the most incredible aroma that had everyone wandering in, asking, “What’s cooking?” This dish is not just a meal; it’s a hug on a plate! The caramelized onions add a deep sweetness that pairs perfectly with the chicken, making each bite a flavorful adventure. Trust me, once you try this, it’ll become a regular on your dinner table!
Ingredients
- 4 chicken breasts, skinless and boneless
- 2 large onions, sliced
- 2 tablespoons olive oil
- 1 tablespoon balsamic vinegar
- Salt to taste
- Pepper to taste
How to Prepare Caramelized Onion Chicken
Alright, let’s dive into the magic of making Caramelized Onion Chicken! This process is simple, and I promise you’ll feel like a gourmet chef in your own kitchen. Follow these steps, and you’ll have a delicious meal in no time!
Step-by-Step Instructions
- First things first, heat up 2 tablespoons of olive oil in a large skillet over medium heat. You want that oil nice and hot, so the onions get a fabulous sear!
- Now, toss in your 2 large sliced onions and let them cook down. You’ll want to stir them occasionally, and keep an eye on them as they transform into golden, caramelized goodness—this should take about 15-20 minutes. Wow, the smell is incredible already!
- While those onions are doing their thing, it’s time to season your 4 chicken breasts with salt and pepper. Don’t be shy with the seasoning; it really enhances the flavor!
- Once your onions are beautifully caramelized, push them to the side of the skillet. Don’t worry, we’re not done with them yet! Now, add the seasoned chicken to the skillet, and let it cook for about 6-8 minutes on each side until it’s nicely browned. You’ll know it’s ready when it’s golden and you can’t resist sneaking a peek!
- After the chicken is browned, drizzle 1 tablespoon of balsamic vinegar over the chicken and onions. This adds an amazing depth of flavor—trust me!
- Cover the skillet and let everything simmer together for about 10 minutes. This step ensures the chicken cooks through completely. You’ll want to check that the chicken reaches an internal temperature of 165°F (75°C) for safety!
- Finally, serve your Caramelized Onion Chicken warm, spooning those luscious onions right on top. Oh, it’s going to be so good!
Nutritional Information
Before we dig into the deliciousness of Caramelized Onion Chicken, let’s take a moment to talk about the nutrition! Just a quick note: the nutritional values can vary depending on the specific brands and ingredients you use, so keep that in mind as you whip up this tasty dish.
- Serving Size: 1 chicken breast with onions
- Calories: 320
- Sugar: 5g
- Sodium: 150mg
- Fat: 10g
- Saturated Fat: 1.5g
- Unsaturated Fat: 8g
- Trans Fat: 0g
- Carbohydrates: 15g
- Fiber: 2g
- Protein: 40g
- Cholesterol: 120mg
With a hearty dose of protein and a balance of flavors, this dish not only satisfies your taste buds but also keeps you feeling full and energized. Enjoy every bite, knowing it’s a wholesome choice!
Why You’ll Love This Recipe
- Quick to Prepare: With just 30 minutes of cook time, you can whip up this dish on even the busiest weeknights!
- Flavorful: The combination of savory chicken and sweet caramelized onions creates a mouthwatering flavor explosion!
- Great for Weeknight Dinners: It’s a simple, satisfying meal that the whole family will enjoy, making it a perfect go-to recipe.
- Gluten-Free: With no gluten ingredients, this dish is suitable for those with gluten sensitivities.
- Impressive Presentation: It looks beautiful on the plate, making it a fantastic option for impressing guests!
- Customizable: You can easily add your favorite herbs or spices for a personal twist!
Tips for Success
Alright, let’s make sure your Caramelized Onion Chicken turns out absolutely perfect! Here are some of my best tips to help you nail this recipe:
- Caramelizing Onions: Patience is key! Cook the onions on medium heat and resist the urge to crank up the heat. This allows them to caramelize slowly, bringing out that lovely sweetness without burning. Stir them occasionally, and don’t rush the process—you want that golden-brown color!
- Check Chicken Doneness: Use a meat thermometer to check the chicken’s internal temperature; it should reach 165°F (75°C) to be safely enjoyed. If you don’t have a thermometer, cut into the thickest part of the chicken—there shouldn’t be any pink inside.
- Seasoning: Don’t skimp on the salt and pepper! A good seasoning will enhance the chicken’s natural flavors and make the dish pop. Feel free to add other spices or herbs you love—thyme or rosemary work wonderfully!
- Timing: Keep an eye on the clock! The cooking times I’ve given are guidelines, but every stove is a little different. If you notice things cooking faster or slower, adjust accordingly.
- Resting Time: After cooking, let the chicken rest for a few minutes before serving. This helps retain the juices and keeps the chicken moist and flavorful.
With these tips in your back pocket, you’ll be well on your way to a delightful dinner that’s sure to impress!
Variations for Caramelized Onion Chicken
If you’re like me and love to mix things up in the kitchen, you’ll be thrilled to know that there are so many fun variations for this Caramelized Onion Chicken! Here are some ideas to take this dish to the next level:
- Herb Infusion: Add fresh herbs like thyme, rosemary, or parsley while cooking to give your chicken an aromatic boost. It’s amazing how a simple herb can elevate the dish!
- Spicy Kick: If you like a bit of heat, sprinkle in some red pepper flakes or paprika when seasoning the chicken. It adds a nice warmth without overpowering the sweetness of the onions.
- Vegetable Medley: Toss in some sliced bell peppers or mushrooms with the onions for added flavor and texture. These veggies will soak up all that delicious caramelization magic!
- Creamy Sauce: For a richer approach, stir in some heavy cream or cream cheese after the chicken is cooked. This creates a luscious sauce that pairs beautifully with the caramelized onions.
- Sweet Twist: Add a touch of brown sugar or a splash of apple cider vinegar to the onions while they caramelize for an extra layer of sweetness and tang. It’s a delightful surprise!
- Mustard Glaze: Brush a thin layer of Dijon mustard over the chicken before cooking for a zesty kick that complements the sweetness of the onions perfectly.
Feel free to get creative and mix and match these variations to suit your taste! Cooking should always be an adventure, and these twists will keep your Caramelized Onion Chicken exciting every time you make it.
Serving Suggestions
Now that you’ve got this scrumptious Caramelized Onion Chicken ready to go, let’s talk about what to serve it with for a complete meal! Trust me, the right sides can elevate your dining experience to a whole new level!
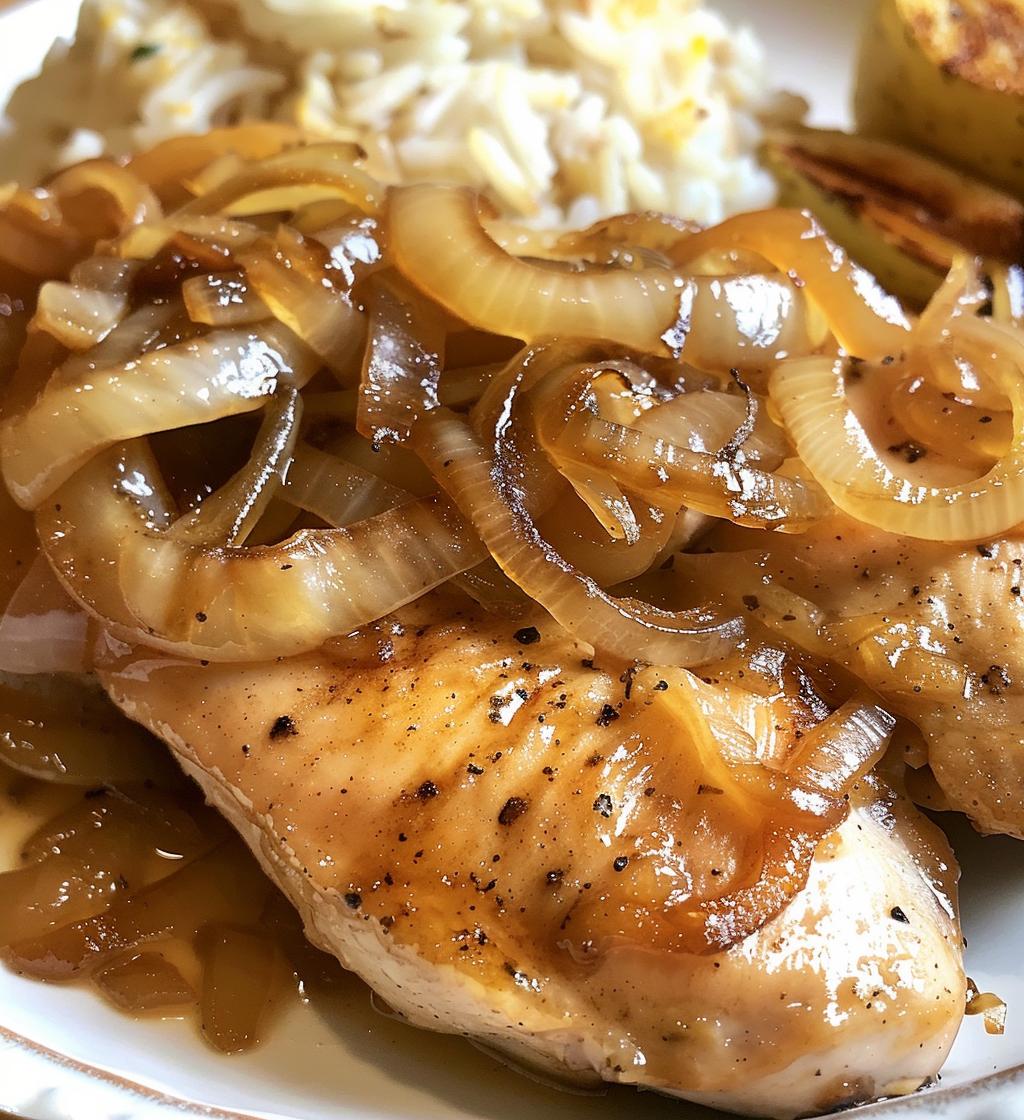
- Fluffy Rice: A classic choice! Serve your chicken over a bed of fluffy white or brown rice to soak up all those delicious juices from the chicken and caramelized onions. It’s like a cozy blanket for your meal!
- Crispy Bread: Need a way to scoop up those sweet onions? Freshly baked crusty bread or soft dinner rolls are perfect for this! Just imagine tearing off a piece to dip into the flavorful sauce. Yum!
- Green Salad: For a refreshing contrast, pair the chicken with a light green salad. A simple mix of mixed greens, cherry tomatoes, and a tangy vinaigrette will add brightness to your plate and balance the richness of the dish.
- Roasted Vegetables: Get some seasonal veggies roasting in the oven while you cook! Carrots, zucchini, or Brussels sprouts drizzled with olive oil and roasted until tender make a wonderful side that complements the sweet and savory notes of the chicken.
- Mashed Potatoes: If you want to indulge a little, creamy mashed potatoes are a fantastic addition! They provide a wonderful base for the chicken and onions, and who can resist that comforting goodness?
- Pasta: Cooked pasta tossed with olive oil and garlic makes for a delightful pairing as well. The noodles will soak up the flavors beautifully, making every bite satisfying!
Feel free to mix and match these sides based on your mood or what you have on hand—each option brings a different vibe to the table. Enjoy your Caramelized Onion Chicken with these delicious accompaniments, and watch everyone come back for seconds!
Storage & Reheating Instructions
Alright, let’s talk leftovers! I know it’s hard to resist devouring every last bite of your Caramelized Onion Chicken, but if you do have some left, here’s how to store and reheat it without losing any of that delicious flavor.
First off, let the chicken cool completely before storing. This helps prevent condensation from forming in the container, which can make everything soggy. Once it’s cool, transfer any leftover chicken and onions to an airtight container. Make sure to keep it in the fridge, where it’ll last for about 3-4 days.
When it’s time to enjoy your leftovers, the best way to reheat is on the stovetop. Just place the chicken and onions in a skillet over medium heat, adding a splash of chicken broth or a bit of water to keep it moist. Cover the skillet and let it warm up, stirring occasionally, until everything is heated through—this usually takes about 5-10 minutes.
If you’re in a rush, you can also use the microwave. Just pop the chicken in a microwave-safe dish, cover it with a damp paper towel (this helps keep it from drying out), and heat it in short intervals of about 1-2 minutes, checking in between to ensure it’s warmed evenly.
One last tip: if you’re planning to store this dish for longer, consider freezing it! Just place the cooled chicken and onions in a freezer-safe container, and it’ll keep for up to 2-3 months. When you’re ready to enjoy it again, thaw it in the refrigerator overnight and follow the reheating instructions above. Easy-peasy!