

Oh my goodness, let me tell you about these Red Velvet Cookie Cups! They’re like little bites of heaven, bursting with that iconic red velvet flavor and topped with a luscious cream cheese frosting that just sings! I first made these for a friend’s birthday party, and honestly, I thought I’d just whip up a simple treat. But when I pulled them out of the oven and saw those perfectly puffed cookie cups, I knew I had something special on my hands. They disappeared faster than I could say “red velvet”! Trust me, once you try them, you’ll be making these adorable cookie cups for every occasion. They’re perfect for parties, holidays, or even just a cozy night in. Let’s dive into the magic of making them!
Ingredients List
- 1 cup unsalted butter, softened
- 1 cup granulated sugar
- 1 cup packed brown sugar
- 2 large eggs
- 2 teaspoons vanilla extract
- 2 1/2 cups all-purpose flour
- 1 tablespoon cocoa powder
- 1 teaspoon baking soda
- 1 teaspoon salt
- 1 tablespoon red food coloring
- 1 cup cream cheese, softened
- 1/2 cup powdered sugar
- 1 teaspoon vanilla extract for frosting
How to Prepare Red Velvet Cookie Cups
Prepping the Dough
Okay, let’s get started on these scrumptious cookie cups! First things first, preheat your oven to 350°F (175°C). This is super important because we want our cookie cups to bake evenly and perfectly! While that’s heating up, grab a large mixing bowl and cream together 1 cup of softened unsalted butter, 1 cup of granulated sugar, and 1 cup of packed brown sugar. You’ll want to mix this until it’s light and fluffy—this usually takes about 2-3 minutes. Then, add in your 2 large eggs and 2 teaspoons of vanilla extract, mixing until everything is beautifully combined.
Now, in a separate bowl, whisk together 2 1/2 cups of all-purpose flour, 1 tablespoon of cocoa powder, 1 teaspoon of baking soda, and 1 teaspoon of salt. Gradually add this dry mixture to your wet ingredients, stirring just until combined. You don’t want to overmix; we’re going for that perfect cookie texture! Finally, add in 1 tablespoon of red food coloring and mix until you see that gorgeous red hue throughout. It’s so much fun to see it come together!
Baking the Cookie Cups
Next up, scoop the dough into a greased muffin tin. I like using an ice cream scoop for this—it makes it super easy and keeps everything uniform! Fill each muffin cup about 2/3 full to give them room to rise. Pop them in the oven and bake for 12-15 minutes. You’ll know they’re done when the edges look firm and the centers are just set but still soft. Let them cool in the pan for about 5 minutes before transferring them to a wire rack to cool completely. This cooling step is crucial; if you try to frost them too soon, the frosting will melt right off. And we definitely don’t want that!
Making the Cream Cheese Frosting
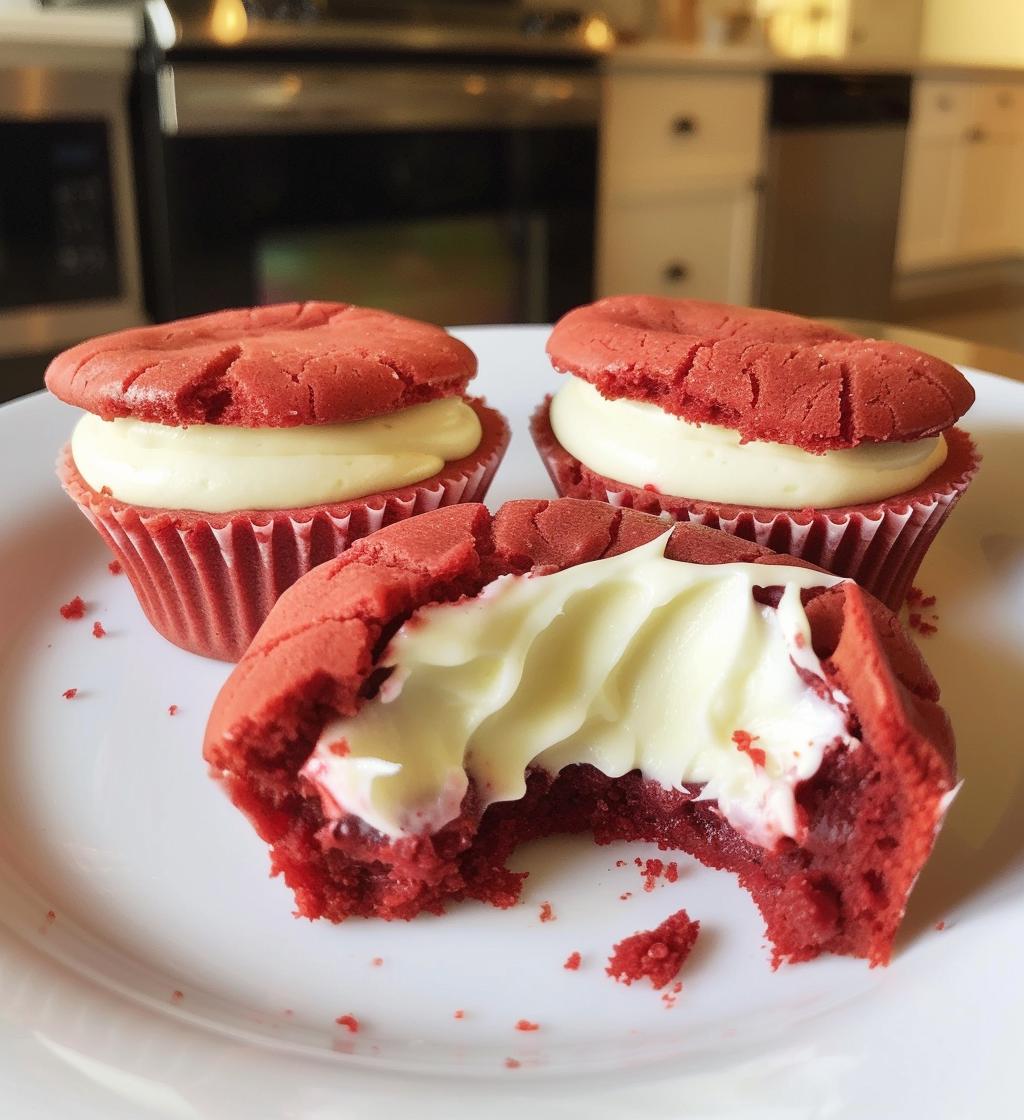
While those cookie cups are cooling, let’s whip up that dreamy cream cheese frosting! In a bowl, combine 1 cup of softened cream cheese, 1/2 cup of powdered sugar, and 1 teaspoon of vanilla extract. Beat this mixture until it’s smooth and creamy—oh, the smell is divine! Once your cookie cups are completely cooled, it’s time to pipe that frosting in. I love using a piping bag for this, but if you don’t have one, a zip-top bag with the corner snipped off works just as well! Fill each cookie cup generously with frosting, and you’re all set to enjoy these delightful treats. Trust me, the combination of that soft cookie and rich frosting is just heavenly!
Why You’ll Love This Recipe
- These cookie cups come together in just 35 minutes, making them a quick and delightful treat you can whip up for any occasion!
- The rich, velvety flavor of red velvet paired with creamy frosting is a match made in dessert heaven—your taste buds will thank you!
- They’re visually stunning, with that vibrant red color and luscious frosting, perfect for impressing friends and family at gatherings.
- Each cookie cup is a perfectly portioned dessert, so you can indulge without the guilt of slicing into a full cake!
- These little bites are incredibly versatile—feel free to customize the frosting or add festive sprinkles for extra flair!
Tips for Success
Alright, let’s make sure your Red Velvet Cookie Cups turn out absolutely perfect! Here are my top pro tips to help you nail this recipe:
- Room Temperature Ingredients: Make sure your butter and cream cheese are at room temperature. This helps them blend smoothly and creates that lush texture we all love!
- Don’t Skip the Cooling: Patience is key! Allow the cookie cups to cool completely before frosting. This prevents the frosting from melting and ensures that you get that beautiful, creamy topping.
- Gel Food Coloring: For that vibrant red hue, I recommend using gel food coloring instead of liquid. It gives a richer color without adding too much moisture to the dough.
- Experiment with Frosting: Feel free to mix up the frosting! Try adding a splash of almond extract or a sprinkle of cocoa powder for a chocolate twist. You could even fold in crushed cookies for added texture!
- Make Ahead: If you’re planning for a party, you can bake the cookie cups a day in advance. Just store them in an airtight container and frost them right before serving to keep everything fresh!
- Check for Doneness: Keep an eye on your cookie cups while they bake! Ovens can vary, so start checking around the 12-minute mark. You want those edges firm and the centers just set.
By following these tips, you’ll create cookie cups that not only look stunning but taste amazing too! Happy baking!
Nutritional Information
Just a quick note before we dive into the numbers—nutrition can vary based on the specific ingredients and brands you use, so keep that in mind. This info is meant to give you a general idea of what to expect, but it’s not set in stone!
- Serving Size: 1 cookie cup
- Calories: 150
- Sugar: 10g
- Sodium: 120mg
- Fat: 7g
- Saturated Fat: 4g
- Unsaturated Fat: 2g
- Trans Fat: 0g
- Carbohydrates: 20g
- Fiber: 1g
- Protein: 2g
- Cholesterol: 30mg
So, whether you’re indulging for a special occasion or just because, you can enjoy these delightful little cookie cups with a bit of awareness about their nutrition. Happy munching!
FAQ Section
Can I make these cookie cups ahead of time?
Absolutely! You can bake the Red Velvet Cookie Cups a day in advance. Just store them in an airtight container and frost them right before you’re ready to serve for maximum freshness!
What can I use instead of red food coloring?
If you’re looking for alternatives, you could try beet juice for a natural option! Just keep in mind that it may alter the flavor slightly, but it’ll still give you that lovely red hue.
How should I store leftover cookie cups?
To keep your Red Velvet Cookie Cups fresh, store them in an airtight container at room temperature for up to 2 days. If you’ve frosted them, it’s best to keep them refrigerated to maintain that creamy texture!
Can I freeze these cookie cups?
Yes, you can! Just freeze the un-frosted cookie cups in an airtight container. When you’re ready to enjoy them, let them thaw at room temperature and then frost just before serving.
What’s the best way to pipe the frosting?
Using a piping bag is my favorite method for frosting these cookie cups—it gives you that gorgeous, professional look! If you don’t have one, a zip-top bag with the corner snipped off works just as well. Just be sure to fill them generously!
Storage & Reheating Instructions
Alright, let’s talk about keeping those Red Velvet Cookie Cups fresh and tasty! After you’ve enjoyed a few (or a lot!), you’ll want to store any leftovers properly to maintain their deliciousness. Here’s what I recommend:
- Room Temperature Storage: If you have un-frosted cookie cups, you can store them in an airtight container at room temperature for up to 2 days. Just make sure they’re completely cool before sealing them up to prevent any sogginess.
- Refrigeration: If you’ve already frosted your cookie cups, it’s best to keep them in the fridge. Store them in an airtight container, and they’ll stay fresh for about 3-4 days. Chilling them also helps the frosting maintain that perfect creamy texture!
- Freezing: Want to make these delightful treats last even longer? Absolutely! You can freeze the un-frosted cookie cups in an airtight container for up to 2 months. Just let them cool completely first. When you’re ready to indulge, let them thaw at room temperature, then whip up some fresh frosting!
- Reheating: If you prefer your cookie cups a little warm, pop them in the microwave for about 10-15 seconds. This will give them a lovely softness. Just be cautious not to overheat them, or they might dry out!
By following these storage and reheating tips, you’ll ensure every bite of your Red Velvet Cookie Cups is as delightful as the first! Enjoy every scrumptious morsel!
Print
Red Velvet Cookie Cups: 4 Steps to Heavenly Treats
- Prep Time: 20 minutes
- Cook Time: 15 minutes
- Total Time: 35 minutes
- Yield: 24 cookie cups 1x
- Category: Dessert
- Method: Baking
- Cuisine: American
- Diet: Vegetarian
Description
Delicious red velvet cookie cups filled with cream cheese frosting.
Ingredients
- 1 cup unsalted butter, softened
- 1 cup granulated sugar
- 1 cup brown sugar, packed
- 2 large eggs
- 2 teaspoons vanilla extract
- 2 1/2 cups all-purpose flour
- 1 tablespoon cocoa powder
- 1 teaspoon baking soda
- 1 teaspoon salt
- 1 tablespoon red food coloring
- 1 cup cream cheese, softened
- 1/2 cup powdered sugar
- 1 teaspoon vanilla extract for frosting
Instructions
- Preheat oven to 350°F (175°C).
- Cream together butter, granulated sugar, and brown sugar.
- Add eggs and vanilla, mix well.
- In a separate bowl, combine flour, cocoa powder, baking soda, and salt.
- Gradually add dry ingredients to wet ingredients.
- Mix in red food coloring until well combined.
- Scoop dough into a greased muffin tin.
- Bake for 12-15 minutes.
- Let cool completely.
- In a bowl, mix cream cheese, powdered sugar, and vanilla for frosting.
- Pipe frosting into cooled cookie cups.
Notes
- Store in an airtight container.
- Use gel food coloring for brighter color.
- Can substitute butter with margarine.
Nutrition
- Serving Size: 1 cookie cup
- Calories: 150
- Sugar: 10g
- Sodium: 120mg
- Fat: 7g
- Saturated Fat: 4g
- Unsaturated Fat: 2g
- Trans Fat: 0g
- Carbohydrates: 20g
- Fiber: 1g
- Protein: 2g
- Cholesterol: 30mg
Keywords: Red Velvet Cookie Cups, Dessert, Baking