

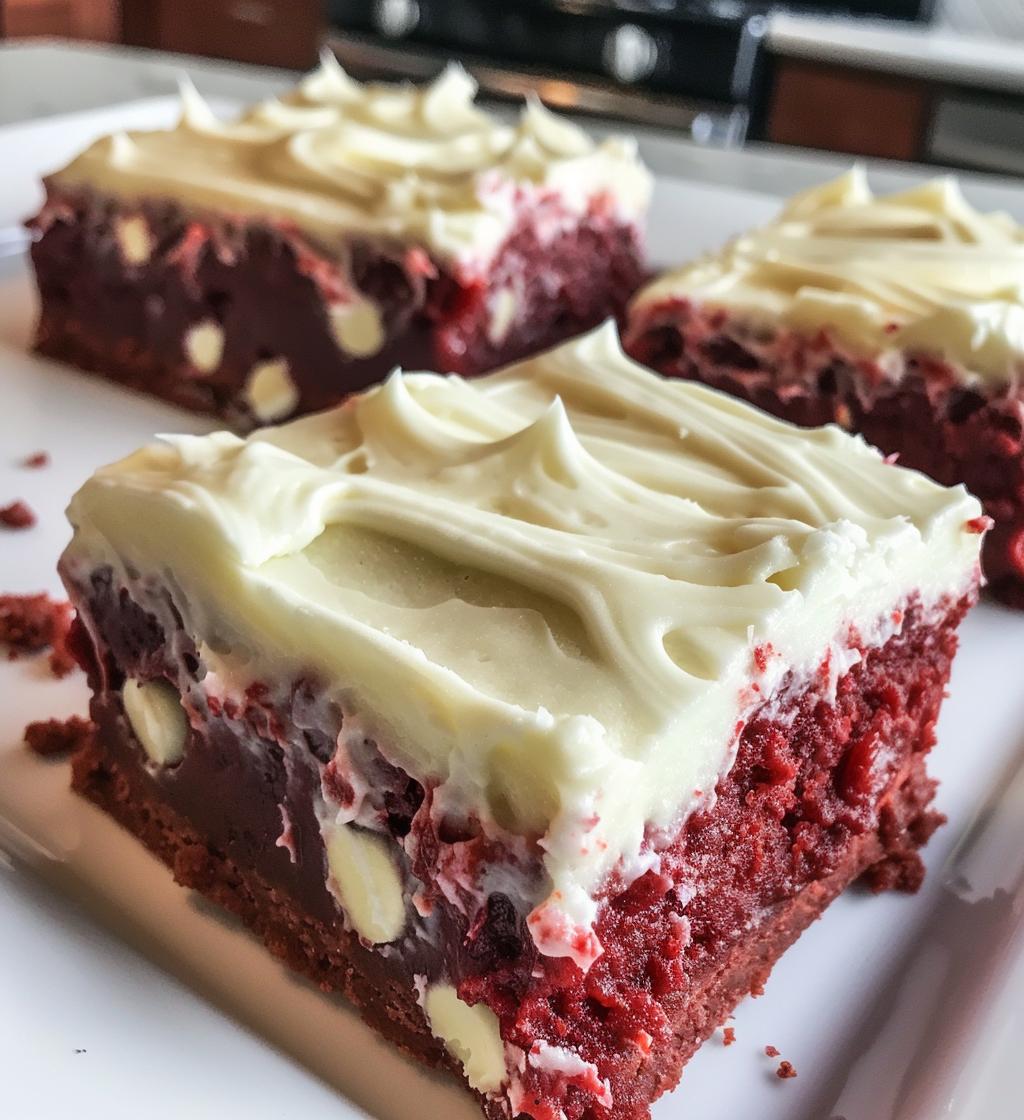
Red Velvet Cookie Bars are like a warm hug in dessert form! They’ve exploded in popularity lately, and honestly, who can resist that gorgeous red color? The best part is how they perfectly blend the chewy goodness of a cookie with the soft, cake-like texture of a cake. It’s like a two-in-one treat that feels so indulgent yet comforting. I remember baking these for my sister’s birthday last year, and the look on her face when she took that first bite was priceless! She absolutely adored them, and I can’t blame her—these bars are rich, delicious, and topped with cream cheese frosting that just takes them over the top. Trust me, once you try them, you’ll be hooked too!
Ingredients List
- 2 1/2 cups all-purpose flour, sifted
- 1 cup granulated sugar
- 1/2 cup packed brown sugar
- 1 cup unsalted butter, softened to room temperature
- 2 large eggs
- 2 tablespoons unsweetened cocoa powder
- 1 teaspoon pure vanilla extract
- 1 tablespoon red food coloring
- 1/2 teaspoon baking soda
- 1/2 teaspoon salt
- 1 cup white chocolate chips
How to Prepare Red Velvet Cookie Bars
- First things first, preheat your oven to 350°F (175°C). This step is crucial because you want those bars to bake perfectly!
- In a large mixing bowl, cream together the softened butter, granulated sugar, and packed brown sugar until the mixture is light and fluffy. I usually beat it for about 3-4 minutes—it really makes a difference!
- Next, add in the eggs, pure vanilla extract, and red food coloring. Make sure to mix well until everything is completely combined. The batter should look beautifully vibrant!
- In another bowl, whisk together the all-purpose flour, unsweetened cocoa powder, baking soda, and salt. This step helps to evenly distribute the dry ingredients.
- Now, gradually add the dry ingredient mixture into the wet mixture, stirring gently. I like to do this in three parts to avoid a flour explosion!
- Once those are combined, it’s time to fold in the white chocolate chips. You can use a spatula to make sure they’re evenly mixed throughout the batter.
- Spread the batter into a greased baking pan, making sure it’s evenly distributed. I like to use a spatula for this, too—gotta get every last bit!
- Pop it in the oven and bake for 25-30 minutes. You’ll know they’re ready when a toothpick inserted into the center comes out clean. Keep an eye on them, as ovens can vary!
- Once baked, let them cool in the pan for a bit before transferring them to a wire rack. Patience is key here—let them cool completely before you add that luscious frosting!
Why You’ll Love This Recipe
- Easy to prepare: These cookie bars come together quickly, making them perfect for both beginners and seasoned bakers!
- Perfect for gatherings: Whether it’s a birthday party, holiday celebration, or just a cozy get-together, these bars are always a hit!
- Moist and flavorful: The combination of butter, sugars, and white chocolate ensures every bite is rich and delicious.
- Pairs well with cream cheese frosting: You can’t go wrong with that classic tangy frosting, which elevates the flavor to a whole new level!
- Visually stunning: That vibrant red color makes these bars an eye-catching addition to any dessert table.
- Great for meal prep: These bars can be made ahead of time and stored for a sweet treat throughout the week!
Tips for Success
Alright, let’s make sure your Red Velvet Cookie Bars turn out absolutely perfect! Here are some of my tried-and-true tips that I swear by:
- Room temperature ingredients: Make sure your butter and eggs are at room temperature before you start. This helps everything blend together smoothly and creates that light, fluffy texture!
- Don’t overmix: When combining your wet and dry ingredients, mix just until everything is incorporated. Overmixing can lead to tough bars, and we want them moist and chewy!
- Check for doneness: Ovens can be tricky! Start checking your bars at 25 minutes. Insert a toothpick into the center—if it comes out clean or with just a few crumbs, they’re ready to come out. They’ll continue to firm up a bit as they cool!
- Cool completely: I know it’s tempting to frost them right away, but let those bars cool completely before adding the frosting. This way, the frosting won’t melt off, and you’ll get that gorgeous, perfect layer!
- Customize your frosting: Feel free to mix in some lemon zest or a splash of vanilla extract into the cream cheese frosting for a little twist. It adds a delightful flavor that complements the red velvet beautifully!
- Store properly: To keep them fresh and moist, store your cookie bars in an airtight container. They’ll stay delicious for several days—if they last that long!
Variations
If you’re feeling adventurous, there are so many fun ways to put your own spin on these Red Velvet Cookie Bars! Here are some creative ideas to get those baking juices flowing:
- Add nuts: Chop up some pecans or walnuts and fold them into the batter for a delightful crunch. They pair beautifully with the rich flavors of red velvet!
- Mix in different chocolates: Swap out the white chocolate chips for dark or semi-sweet chocolate chips for a richer taste. You could even do a mix of chocolate types for a fun twist!
- Incorporate spices: Add a pinch of cinnamon or nutmeg to the dry ingredients for a warm, cozy flavor that complements the cocoa. It’s a little unexpected and oh-so-delicious!
- Swirl in cream cheese: Before baking, drop dollops of cream cheese into the batter and gently swirl it with a knife. This creates a dreamy, creamy layer in the bars!
- Make it a layered dessert: Bake the bars in a larger pan, cut them into squares, and layer them with whipped cream and fresh berries for a stunning dessert trifle!
- Top with a glaze: Instead of frosting, drizzle a simple glaze made of powdered sugar and milk on top for a lighter finish. It’s sweet and still super tasty!
Feel free to mix and match these ideas or come up with your own! The possibilities are really endless, and that’s part of the fun of baking!
Nutritional Information
Now, let’s take a quick look at the estimated nutritional information for these delightful Red Velvet Cookie Bars. Keep in mind that these values can vary based on specific ingredients and portion sizes, but here’s a general breakdown for one cookie bar:
- Calories: 210
- Sugar: 15g
- Fat: 10g
- Saturated Fat: 6g
- Unsaturated Fat: 4g
- Trans Fat: 0g
- Cholesterol: 30mg
- Sodium: 150mg
- Carbohydrates: 28g
- Fiber: 1g
- Protein: 2g
These bars are a treat, so enjoy them in moderation! They pack a lot of flavor and sweetness into each bite, making them well worth every calorie. Happy baking!
Storage & Reheating Instructions
So, you’ve got some delicious Red Velvet Cookie Bars left over—awesome! To keep them fresh and tasty, you’ll want to store them in an airtight container. This will help maintain their moisture and prevent any weird fridge odors from sneaking in. I usually layer them with parchment paper between the bars to avoid sticking, but that’s totally up to you!
These bars can be stored at room temperature for about 3-4 days, or you can pop them in the fridge for up to a week if you prefer them chilled. Just remember, the colder they get, the firmer they’ll be, so if you like that soft, chewy texture, room temperature is the way to go!
If you find yourself with a whole batch and want to save some for later, you can freeze them! Just wrap each bar tightly in plastic wrap and then place them in a freezer-safe bag. They’ll stay good for about 2-3 months. When you’re ready to enjoy, simply take them out and let them thaw at room temperature for about 30 minutes. No need to reheat, but if you love a warm treat, you can pop them in the microwave for about 10-15 seconds to get that gooey goodness back!
FAQ Section
Got questions about Red Velvet Cookie Bars? Don’t worry, I’ve got you covered! Here are some common queries and answers that can help you out:
Can I substitute the red food coloring?
Absolutely! If you’re looking for a natural alternative, you can use beet juice or powdered beetroot for a similar color. Just keep in mind that the shade might be a bit different, but it’ll still taste delicious!
What if I don’t have white chocolate chips?
No problem at all! You can swap them for dark or semi-sweet chocolate chips if you prefer. They’ll add a rich, chocolaty flavor that pairs beautifully with the red velvet!
How should I store these cookie bars?
Store your Red Velvet Cookie Bars in an airtight container to keep them fresh! They’ll last about 3-4 days at room temperature or up to a week in the fridge. Just remember to layer them with parchment paper if you’re stacking them!
How can I achieve that vibrant red color?
For the best color, make sure you’re using a good quality red food coloring. If you want an even bolder hue, feel free to add a bit more food coloring, but be careful not to overdo it. A little goes a long way!
Can I make these cookie bars gluten-free?
You sure can! Just substitute the all-purpose flour with your favorite gluten-free flour blend. The texture might vary slightly, but they’ll still be tasty!
What’s the best way to cut these bars?
For clean cuts, make sure your bars are completely cooled before slicing. Use a sharp knife and wipe it clean between cuts for that perfect presentation. It’s all about that Instagram-worthy look!
Hopefully, these FAQs help you in your baking adventure! If you think of any other questions, feel free to reach out. Happy baking!
Serving Suggestions
Now that you’ve got your scrumptious Red Velvet Cookie Bars ready, let’s talk about how to elevate your dessert experience! Trust me, pairing these bars with the right accompaniments can take them to another level of deliciousness.
- Cream Cheese Frosting: Of course, you can’t go wrong with a generous dollop of cream cheese frosting on top! It adds a tangy sweetness that perfectly complements the rich flavors of the bars.
- Fresh Berries: Serve alongside some fresh strawberries or raspberries. Their tartness balances the sweetness of the cookie bars beautifully, and they look so pretty on the plate!
- Iced Coffee: A nice glass of iced coffee or a latte pairs wonderfully. The coffee’s slight bitterness enhances the sweet flavors of the bars and makes for a delightful treat any time of day.
- Vanilla Ice Cream: A scoop of creamy vanilla ice cream is pure magic with these bars! The cold ice cream melts into the warm cookie bars, creating an irresistible combination.
- Milk: You can’t beat the classic! A chilled glass of milk is the perfect sidekick to these cookie bars, making each bite even more satisfying.
- Chocolate Drizzle: Drizzle some melted dark chocolate over the top for a rich finishing touch. It adds a lovely depth of flavor that chocolate lovers will adore!
- Whipped Cream: Top them with some fluffy whipped cream for an extra layer of lightness. You could even add a sprinkle of cocoa powder for a little flair!
Feel free to mix and match these suggestions or get creative with your own pairings! The key is to enjoy these delightful bars with whatever makes your taste buds sing. Happy indulging!
Print
Red Velvet Cookie Bars: 7 Indulgent Tips for Perfection
- Prep Time: 15 minutes
- Cook Time: 30 minutes
- Total Time: 45 minutes
- Yield: 24 cookie bars 1x
- Category: Dessert
- Method: Baking
- Cuisine: American
- Diet: Vegetarian
Description
Delicious red velvet cookie bars with cream cheese frosting.
Ingredients
- 2 1/2 cups all-purpose flour
- 1 cup granulated sugar
- 1/2 cup brown sugar
- 1 cup unsalted butter, softened
- 2 large eggs
- 2 tablespoons cocoa powder
- 1 teaspoon vanilla extract
- 1 tablespoon red food coloring
- 1/2 teaspoon baking soda
- 1/2 teaspoon salt
- 1 cup white chocolate chips
Instructions
- Preheat your oven to 350°F (175°C).
- In a bowl, cream together the butter, granulated sugar, and brown sugar.
- Add the eggs, vanilla extract, and food coloring. Mix well.
- In another bowl, combine flour, cocoa powder, baking soda, and salt.
- Gradually add the dry ingredients to the wet mixture.
- Fold in the white chocolate chips.
- Spread the batter into a greased baking pan.
- Bake for 25-30 minutes or until a toothpick comes out clean.
- Let cool before frosting.
Notes
- Store in an airtight container.
- Can be topped with cream cheese frosting.
- Adjust food coloring for desired color intensity.
Nutrition
- Serving Size: 1 cookie bar
- Calories: 210
- Sugar: 15g
- Sodium: 150mg
- Fat: 10g
- Saturated Fat: 6g
- Unsaturated Fat: 4g
- Trans Fat: 0g
- Carbohydrates: 28g
- Fiber: 1g
- Protein: 2g
- Cholesterol: 30mg
Keywords: Red Velvet Cookie Bars, dessert, baking, cream cheese frosting