

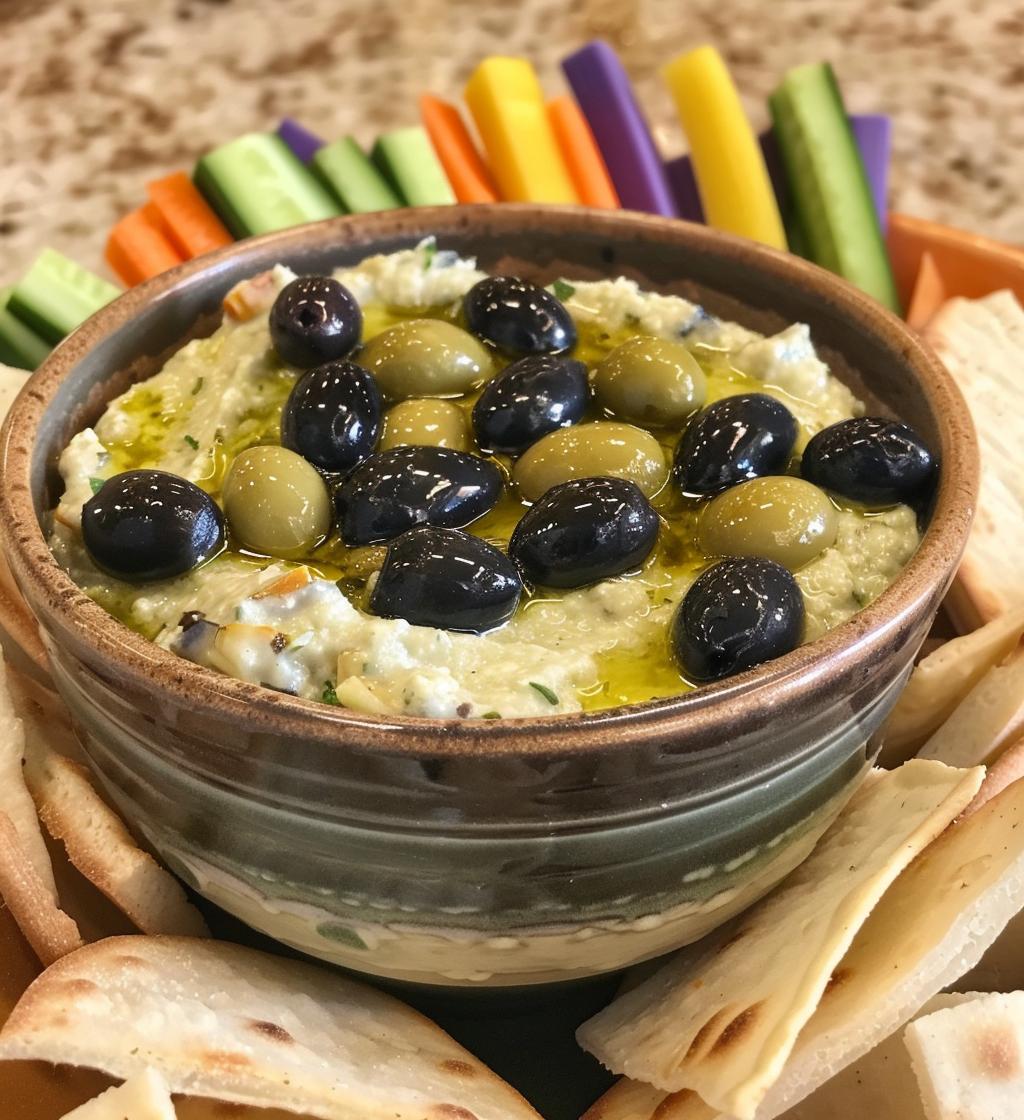
Oh, let me tell you about my absolute favorite Olive Dip! This dip is the ultimate crowd-pleaser and perfect for any occasion. Whether I’m hosting a casual get-together or just craving a savory snack, this rich and flavorful spread never disappoints. Honestly, it’s like a little taste of the Mediterranean on your table! I remember the first time I made it; I was trying to impress some friends, and it turned out to be a hit! The combination of black and green olives with creamy goodness just makes my heart sing. Plus, it’s so versatile—you can serve it with pita chips, fresh veggies, or even slather it on a sandwich! Trust me, once you try this Olive Dip, you’ll be making it again and again!
Ingredients List
- 1 cup pitted black olives – Make sure they’re well-drained for the best flavor!
- 1 cup pitted green olives – I love using a mix for that vibrant taste!
- 1/2 cup cream cheese – Let it soften a bit for easy blending; trust me, it makes a difference!
- 1/4 cup olive oil – Use a good-quality extra virgin for that rich, fruity flavor.
- 2 cloves garlic, minced – Fresh garlic adds such a nice kick, but you can adjust to your taste!
- 1 tablespoon lemon juice – This brightens everything up; don’t skip it!
- 1 teaspoon dried oregano – A nice touch of Mediterranean flair; feel free to add a little more if you love it!
How to Prepare Olive Dip
Making this Olive Dip is a breeze! Trust me, you’ll have it ready in no time and be amazed at how easy it is to whip up this deliciousness. Just follow these simple steps, and you’ll be on your way to a fantastic appetizer that everyone will love!
Step 1: Combine Ingredients
First things first, grab your food processor and toss in all those lovely ingredients: the black olives, green olives, cream cheese, olive oil, minced garlic, lemon juice, and dried oregano. It’s like a little party in there! Just make sure everything is ready to go before you start blending.
Step 2: Blend Until Smooth
Now, secure the lid on your food processor and blend away! You want that dip to be super smooth, so let it run for about 30 seconds to a minute. If you see any chunks, just give it another pulse or two until it’s silky and creamy. Wow, the smell already is making my mouth water!
Step 3: Taste and Adjust Seasoning
Here’s where you can really make this dip your own! Give it a taste and see if it needs a little more lemon juice or maybe a pinch of salt. Don’t be shy—this is your chance to customize the flavors to suit your palate. Just remember, you can always add more, but you can’t take it out!
Step 4: Transfer to Serving Bowl
Once you’re happy with the flavor, it’s time to transfer that gorgeous dip into a serving bowl. I like to use a spatula to get every last bit out of the processor—no waste here! Then, give it a little swirl on top to make it look extra inviting.
Step 5: Chill Before Serving
Now, here’s a crucial step: you want to chill your Olive Dip in the refrigerator for about 30 minutes before serving. This not only helps the flavors meld together beautifully but also gives it the perfect texture. Trust me; it’s worth the wait!
Why You’ll Love This Recipe
- It’s incredibly quick to make—just a few minutes in the food processor, and you’re done!
- Super easy to whip up, even for beginner cooks—no complicated steps here!
- Loaded with flavor from the olives, garlic, and a hint of lemon—each bite is a taste sensation!
- Perfect for any occasion, whether it’s a casual snack at home or a fancy appetizer for guests.
- Healthy and vegetarian-friendly, making it a guilt-free indulgence!
- Versatile enough to serve with pita chips, fresh veggies, or even as a sandwich spread!
Nutritional Information
Here’s the estimated nutritional information for my delightful Olive Dip, based on a serving size of 2 tablespoons. Keep in mind that these values can vary slightly depending on the specific brands and types of ingredients you use, but this gives you a good idea of what you’re enjoying:
- Calories: 80
- Fat: 8g
- Saturated Fat: 2g
- Unsaturated Fat: 6g
- Trans Fat: 0g
- Cholesterol: 10mg
- Sodium: 250mg
- Carbohydrates: 2g
- Fiber: 1g
- Sugar: 0g
- Protein: 1g
This Olive Dip not only satisfies your taste buds but also keeps things pretty light and healthy. Enjoy digging in while knowing you’re indulging in something nutritious! Perfect for guilt-free snacking!
Tips for Success
To make sure your Olive Dip turns out amazing every single time, I’ve got a few pro tips that I swear by! Just little tweaks that can elevate your dip to the next level!
- Use quality olives: This is key! Go for good-quality black and green olives. The flavor really shines through, and you’ll taste the difference!
- Let the cream cheese soften: Take it out of the fridge ahead of time to soften. This makes blending so much easier and helps you achieve that ultra-smooth texture!
- Don’t skimp on the garlic: If you love that garlicky punch, feel free to add an extra clove or two! Just remember, fresh garlic packs a more intense flavor than powdered.
- Experiment with herbs: While dried oregano is fantastic, don’t hesitate to throw in some fresh herbs like basil or parsley for a fresh twist!
- Adjust the consistency: If your dip seems too thick, add a splash more olive oil or a tiny bit of water to loosen it up. You want that perfect spreadable texture!
- Let it sit: Chilling your dip isn’t just for flavor—it allows all those delicious flavors to meld beautifully! If you have time, letting it sit for a few hours (or even overnight) is a game changer!
With these tips in your back pocket, you’ll be the Olive Dip queen (or king) in no time! Enjoy the process and have fun with it!
Serving Suggestions
When it comes to serving my delightful Olive Dip, the options are endless! I love to keep things simple yet delicious, and a few of my favorite pairings really elevate the whole experience. Here are some tasty ideas to get you started:
- Pita chips: These crunchy, salty chips are a classic choice! They scoop up the dip perfectly and add a satisfying crunch.
- Fresh vegetables: Think sliced cucumbers, bell peppers, and baby carrots. They add a refreshing crunch and are a healthy way to enjoy the dip!
- Crackers: Any kind of cracker works wonders! I personally love a nice whole grain or herb-flavored cracker for an extra layer of flavor.
- Bread: Sliced baguette or toasted pita bread is fantastic for dipping! You can even make little crostini for a more elegant touch.
- Cheese platter: Serve it alongside a variety of cheeses for a rich appetizer spread. Creamy cheeses like goat cheese or feta pair beautifully with the Olive Dip!
- Sandwich spread: Use it as a flavorful spread in wraps or sandwiches. It adds that Mediterranean flair to your lunch!
Feel free to mix and match these suggestions based on your mood or the occasion. No matter what you choose, this Olive Dip will steal the show and have everyone coming back for more!
Storage & Reheating Instructions
Storing leftover Olive Dip is super easy! Just transfer any uneaten dip into an airtight container and pop it in the fridge. It’ll stay fresh for up to 3 days, so you can enjoy it again later! I love finding it in the fridge as a little surprise treat during the week!
Now, if you’re wondering about reheating, here’s the scoop: this dip is best served cold or at room temperature, so there’s really no need to heat it up. Just give it a good stir before serving to bring back that creamy texture after chilling. If it seems a bit thick, you can mix in a tiny splash of olive oil to loosen it up. Trust me, it’ll still taste just as amazing!