

Oh my goodness, let me tell you about the magic of making Condensed Milk Snowballs during the holidays! Every year, I gather my friends and family in the kitchen, and we whip up these little delights together. The best part? They’re so incredibly simple to make! Just a handful of ingredients and you’ll have these sweet, coconut-covered treats that melt in your mouth. Trust me, the joy on everyone’s faces when they bite into one is priceless. Plus, they’re no-bake, so you get to skip the oven heat while still indulging in something delicious. It’s a holiday tradition I cherish, and I know you’ll love it too!
Ingredients List
- 1 cup of sweetened condensed milk – This is the sweet and creamy base that binds everything together!
- 2 cups of shredded coconut – Use unsweetened if you prefer less sweetness, but I love the added texture and flavor of the sweetened variety!
- 1 cup of crushed graham crackers – These add a delightful crunch and a hint of honey flavor that complements the coconut perfectly.
- 1 teaspoon of vanilla extract – A splash of vanilla elevates the overall taste and adds warmth to these treats.
How to Prepare Condensed Milk Snowballs
Alright, let’s get our hands a little sticky and make these delightful Condensed Milk Snowballs! I promise, it’s super easy and oh-so-fun!
Mixing the Ingredients
First things first, grab a big mixing bowl and combine that 1 cup of sweetened condensed milk, 2 cups of shredded coconut, 1 cup of crushed graham crackers, and 1 teaspoon of vanilla extract. You’ll want to mix them together until everything is well combined—just use a sturdy spatula or your hands if you’re feeling adventurous! The mixture should be sticky and slightly thick, which makes it easier to shape later!
Chilling the Mixture
Once you’ve mixed everything together, it’s time to chill! Cover the bowl with some plastic wrap and pop it in the refrigerator for about 30 minutes. This step is crucial, trust me! Chilling the mixture helps it firm up, making it way easier to roll into those adorable snowballs.
Forming the Snowballs
After the mixture has chilled, take it out and get ready to shape! Using a small cookie scoop or your hands, scoop out portions of the mixture—about a tablespoon each works great. Roll them gently between your palms to form nice, round balls. Don’t worry if they’re not perfect; a little character makes them special! Aim for uniform sizes so they look cute on the platter!
Coating the Snowballs
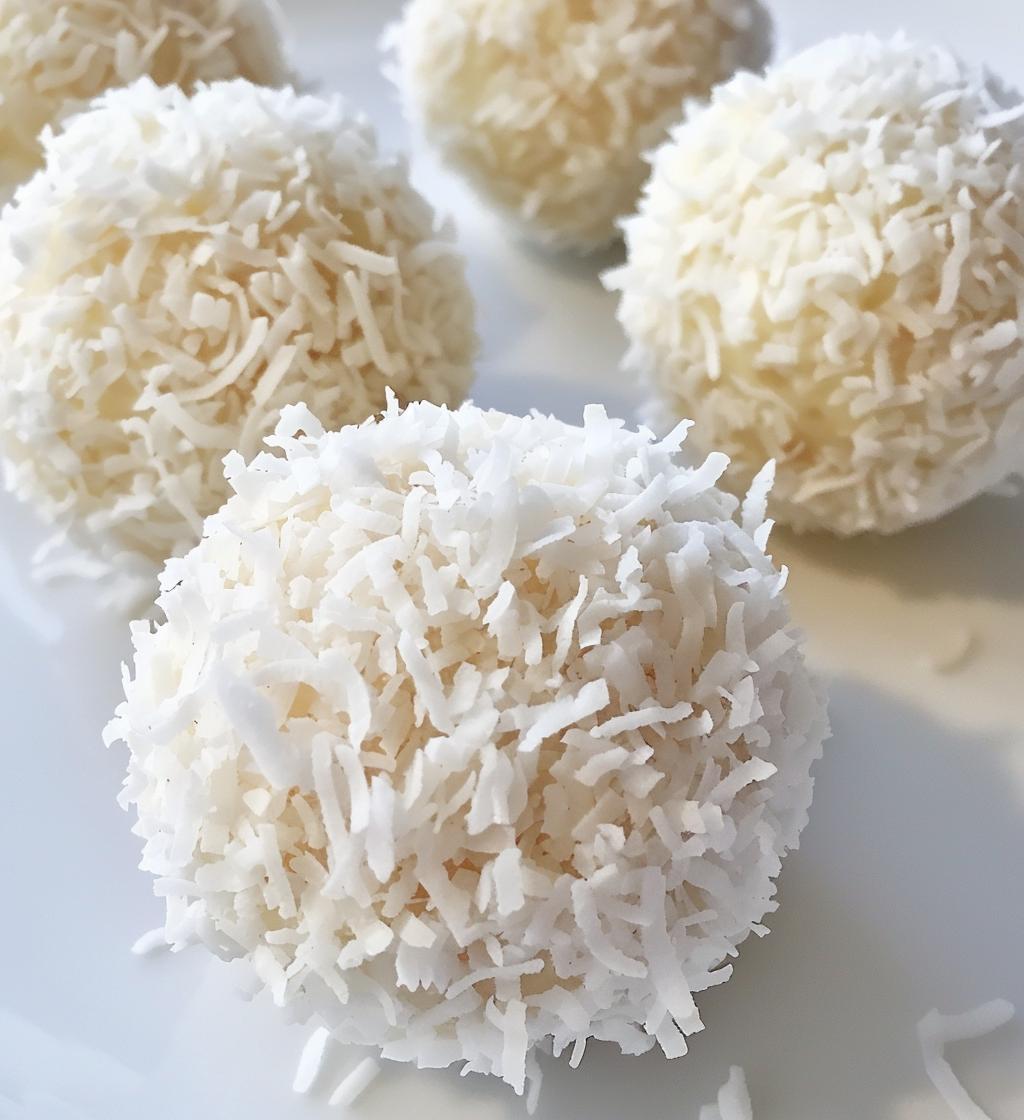
Now for the fun part! Roll each ball in some additional shredded coconut to coat them. This not only adds extra texture but also makes them look like little snowballs! Just keep rolling until they’re all covered, and you’ll have a beautiful snowy appearance.
Final Refrigeration
Okay, we’re almost there! Place the coated snowballs on a baking sheet and pop them back in the fridge for another hour. This helps them set perfectly, so they’ll hold their shape when you serve them. Trust me, waiting is hard, but the payoff is oh-so-worth it!
Nutritional Information
Let’s chat about the nutritional goodness of these delightful Condensed Milk Snowballs! Each little snowball is a sweet treat that you can enjoy without too much guilt. Here’s what you can expect per serving (that’s one snowball, by the way):
- Calories: 100
- Fat: 5g
- Saturated Fat: 4g
- Unsaturated Fat: 1g
- Trans Fat: 0g
- Carbohydrates: 12g
- Sugar: 10g
- Fiber: 1g
- Protein: 1g
- Sodium: 15mg
- Cholesterol: 5mg
Keep in mind, these values are estimates based on typical ingredients, so they might vary a bit depending on the brands you use. But hey, a little sweetness in life is always a good thing, right?
Tips for Success
Making the perfect Condensed Milk Snowballs is all about a few little tricks! First, don’t be afraid to get creative—add in some chopped nuts or chocolate chips for a delightful twist! I love tossing in some mini chocolate chips for that extra sweetness. Also, if you prefer a less sweet version, try using unsweetened coconut for the coating. Another tip? Make sure your mixture is really chilled before rolling; it makes all the difference in achieving that perfect shape! And remember, these little treats are fantastic for gifting—just pack them in a cute box, and you’ve got a lovely homemade present!
Serving Suggestions
When it comes to enjoying your Condensed Milk Snowballs, I’ve got a few delightful pairings that can elevate your experience! First up, a steaming cup of coffee or tea makes for the perfect companion. The rich flavors of coffee or the soothing notes of herbal tea balance out the sweetness beautifully. My favorite is a nice chai latte – it adds a warm, spicy kick that complements the coconut perfectly!
If you’re feeling a bit adventurous, try serving them alongside a scoop of vanilla ice cream. The contrast of temperatures and textures is just delightful! You could even drizzle some chocolate or caramel sauce over the ice cream for an indulgent treat. And don’t forget to add a sprinkle of extra shredded coconut on top for that extra touch!
These snowballs are also fantastic on a dessert platter for any gathering. Just imagine them nestled next to some brownies or fruit tarts – it’s a colorful and inviting display that will impress your guests. Trust me, whatever you choose to serve them with, they’ll be the star of the show!
Storage Instructions
Alright, let’s talk about how to keep those delicious Condensed Milk Snowballs fresh! The best way to store any leftovers is in an airtight container in the fridge. This will help them maintain their delightful texture and flavor. They’ll stay good for about 5 days, but I doubt they’ll last that long once you share them with family and friends!
What’s even better? You can make these little treats a day in advance! Just whip them up, store them in your container, and let them chill in the fridge overnight. They’ll be perfectly set and ready to impress when you serve them. Trust me, making them ahead of time is a total game-changer, especially during the busy holiday season!
FAQ Section
Can I make these snowballs vegan? Absolutely! To make vegan Condensed Milk Snowballs, simply use a plant-based condensed milk alternative. There are some great coconut or almond-based options available. Just be sure to check the ingredients to ensure they fit your dietary preferences!
How can I make these gluten-free? No problem at all! To make your snowballs gluten-free, just swap out the regular graham crackers for gluten-free ones. There are many brands that offer delicious gluten-free alternatives, so you can enjoy these treats without worry!
Can I customize the flavors? Definitely! I love experimenting with flavors. You can add a bit of almond extract instead of vanilla for a nutty twist, or mix in some zesty lemon or orange zest for a refreshing kick. If you’re a chocolate lover, toss in some mini chocolate chips or drizzle melted chocolate on top before serving!
How do I keep them from sticking together? If you’re worried about your snowballs sticking to each other, just make sure they’re well-chilled before storing them. You can also place parchment paper between layers in your container to help keep them separated. It’s a simple trick that works wonders!
How long can I freeze them? You can freeze these snowballs for up to a month! Just make sure to store them in an airtight container or a freezer bag. When you’re ready to enjoy, let them thaw in the fridge overnight. Then, they’ll taste just as fresh as the day you made them!