

Oh my goodness, if you’re looking for a breakfast that feels like a cozy hug, look no further than these peppermint waffles! Imagine fluffy, warm waffles infused with that delightful peppermint flavor that just screams holiday cheer. They’re perfect for brunch gatherings or a special breakfast treat when you want to impress your friends and family. Trust me, the smell of these waffles cooking will have everyone racing to the kitchen! This recipe is particularly special to me because it brings back memories of holiday mornings spent with loved ones, sipping hot cocoa and enjoying the festive vibes. You’ll want to make these again and again!
Ingredients
- 1 cup all-purpose flour – This is the base for our waffles, giving them that perfect fluffy texture.
- 1 tablespoon sugar – Just a hint of sweetness to balance the peppermint flavor.
- 1 tablespoon baking powder – This helps the waffles rise and become light and airy.
- 1/4 teaspoon salt – A little salt enhances all the flavors beautifully.
- 1 cup milk – Whole milk works best for a rich taste, but feel free to use any milk you prefer.
- 1 large egg – This adds structure and richness to the batter.
- 2 tablespoons melted butter – Melted butter gives the waffles a lovely, buttery flavor and helps them crisp up nicely.
- 1 teaspoon peppermint extract – This is where the magic happens! Adjust to your taste for a stronger or milder peppermint kick.
How to Prepare Peppermint Waffles
Step-by-Step Instructions
- First, grab a mixing bowl and whisk together the flour, sugar, baking powder, and salt. This dry mixture is the foundation for your waffles.
- In another bowl, whisk together the milk, egg, melted butter, and peppermint extract until fully combined. You’ll love how the peppermint scent fills the air!
- Now, pour the wet ingredients into the dry mixture. Stir gently until just combined; don’t overmix or you’ll end up with tough waffles. A few lumps are totally okay!
- While you let the batter rest for a minute, preheat your waffle iron. Lightly grease it with a bit of non-stick spray or melted butter to ensure those waffles release easily.
- Once your waffle iron is hot, pour the batter onto the center of the iron, using about 1/2 cup for each waffle. Close the lid and cook until golden brown—this usually takes about 4 to 5 minutes, but keep an eye on it!
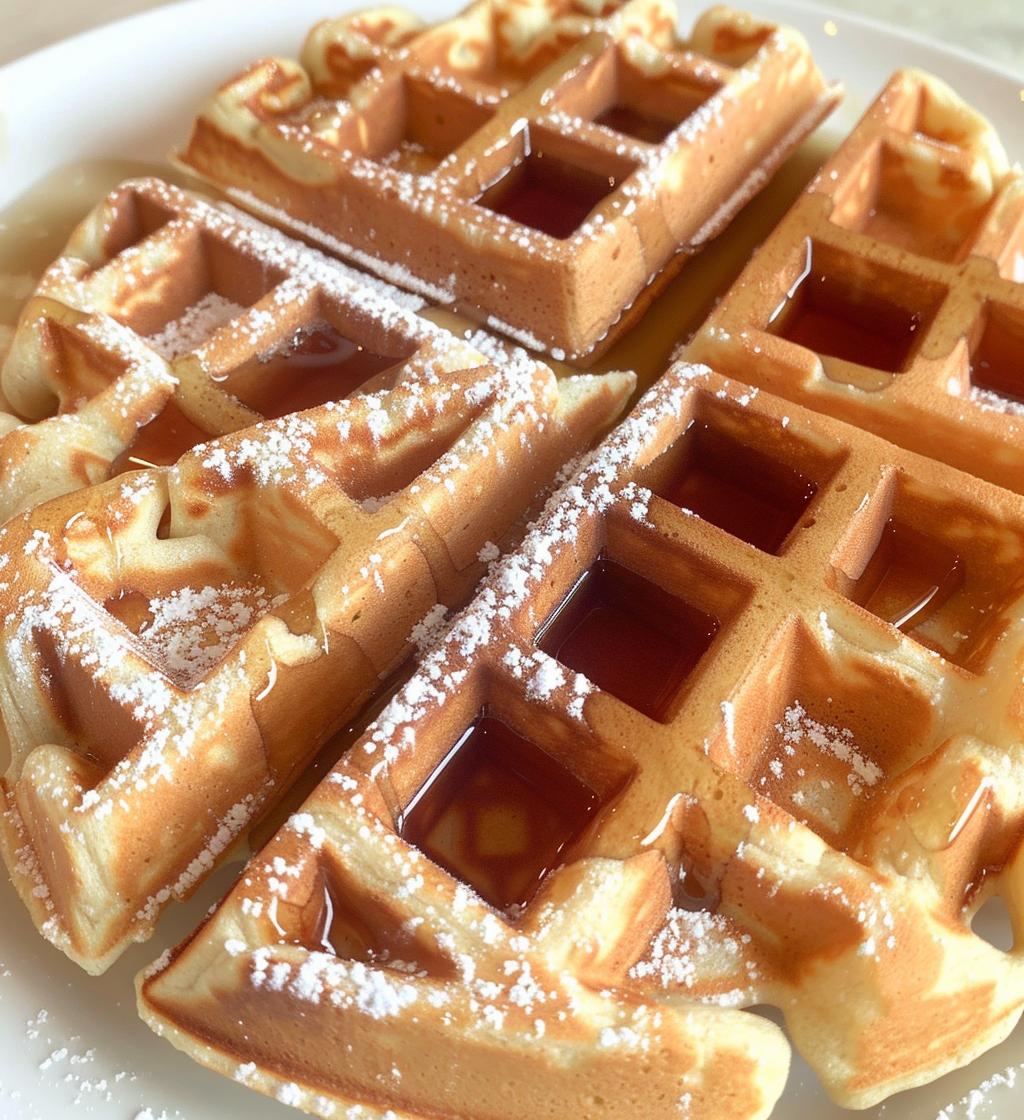
- When they’re done, carefully remove the waffles and serve them warm. They’re delicious with syrup, whipped cream, or even a sprinkle of crushed candy canes for that extra festive touch!
Why You’ll Love This Recipe
- Quick and easy to prepare—perfect for busy mornings or last-minute brunch plans!
- Deliciously fluffy waffles with a delightful peppermint flavor that’s sure to impress.
- A festive twist that makes them ideal for holiday gatherings or cozy winter breakfasts.
- Customizable to your taste—add chocolate chips or your favorite toppings for an extra treat.
- They freeze beautifully, so you can whip up a batch and enjoy them later!
- A fun way to bring holiday cheer to your breakfast table and create lasting memories.
Tips for Success
Alright, let’s make sure your peppermint waffles turn out absolutely perfect! Here are some of my favorite pro tips to help you achieve waffle greatness:
- Don’t overmix: It’s super tempting to stir the batter until it’s perfectly smooth, but trust me, a few lumps are totally okay! Overmixing can lead to tough waffles instead of the light and fluffy ones we want.
- Let the batter rest: After mixing, let your batter sit for about 5 minutes. This helps the baking powder activate fully and results in fluffier waffles.
- Preheat your waffle iron: Make sure your waffle iron is hot before pouring in the batter. A hot iron ensures that the waffles get that lovely golden-brown color and crispy edges.
- Grease it right: Even if your waffle iron is non-stick, a light greasing with butter or oil can help avoid any sticking issues. Nobody wants a waffle disaster!
- Cook time matters: Keep an eye on the cooking time. Each waffle iron is different, so check your waffles after about 4 minutes. They’re ready when they’re golden and crisp—if you wait too long, they can dry out!
- Experiment with toppings: Get creative! These waffles are great with a variety of toppings. Think whipped cream, fresh berries, or even a drizzle of chocolate sauce for an extra special treat.
With these tips in your back pocket, I know you’ll whip up some amazing peppermint waffles that everyone will rave about!
Variations
Now, let’s have some fun and get creative with these peppermint waffles! There are so many delicious ways to mix things up and make this recipe your own. Here are a few of my favorite variations:
- Chocolate Mint Delight: Add some mini chocolate chips to the batter for a delightful chocolate-peppermint combo. You can also drizzle melted chocolate on top—yum!
- Coconut Twist: Substitute a bit of coconut milk for regular milk and add shredded coconut to the batter for a tropical twist that pairs beautifully with peppermint.
- Spicy Peppermint: If you like a little heat, try adding a pinch of cayenne pepper or ground ginger to the batter. It adds an unexpected kick that complements the sweetness!
- Vanilla Variation: Swap out the peppermint extract for vanilla extract for a classic flavor. These waffles will still be fluffy and delicious, just in a different way!
- Fruit Toppings Galore: Top your waffles with fresh berries, banana slices, or even a warm fruit compote. The sweetness of the fruits balances perfectly with the peppermint flavor.
- Gluten-Free Option: Use a gluten-free all-purpose flour blend in place of regular flour. Just make sure your baking powder is gluten-free, too!
Feel free to experiment! Each variation brings a unique taste experience, and I can’t wait for you to discover your favorite. Happy cooking!
Storage & Reheating Instructions
So, you’ve whipped up a batch of these scrumptious peppermint waffles, and now you have some leftovers—lucky you! Storing them correctly will keep them tasty for future breakfasts. Here’s how to do it:
- Storing: Let the waffles cool completely before storing. This prevents condensation from making them soggy. Once they’re cool, place them in an airtight container or wrap them tightly in plastic wrap. They’ll stay fresh in the fridge for up to 3 days.
- Freezing: For longer storage, you can freeze them! Just layer the waffles with parchment paper in between to prevent sticking, then place them in a freezer-safe bag or container. They’ll keep well for about 2 months.
Now, when you’re ready to enjoy those delightful waffles again, here’s the best way to reheat them:
- Toaster: Pop them in the toaster for a quick and easy reheating method. This will give them that lovely crispiness back!
- Oven: Preheat your oven to 350°F (175°C) and place the waffles directly on the oven rack or a baking sheet. Heat for about 5-10 minutes until warmed through.
- Microwave: If you’re in a hurry, you can use the microwave, but be careful! Heat them in 15-second intervals to avoid them becoming rubbery. A quick zap should do the trick!
With these storage and reheating tips, you can savor your peppermint waffles any time you like—enjoy every delicious bite!
Nutritional Information
Just a quick note before we dive into the numbers! Keep in mind that nutrition can vary based on the specific ingredients and brands you use, so these values are approximate. Here’s what you can expect per serving (1 waffle):
- Calories: 200
- Sugar: 5g
- Sodium: 300mg
- Fat: 8g
- Saturated Fat: 4g
- Unsaturated Fat: 3g
- Trans Fat: 0g
- Carbohydrates: 30g
- Fiber: 1g
- Protein: 5g
- Cholesterol: 40mg
These delicious peppermint waffles are not just a festive treat but also a delightful addition to your breakfast repertoire, and knowing the nutritional breakdown can help you enjoy them even more. Happy indulging!
FAQ Section
Can I adjust the sweetness of the waffles?
Absolutely! If you prefer your waffles a bit sweeter, feel free to add an extra tablespoon of sugar to the dry ingredients. You can also serve them with a sweeter syrup or whipped cream to balance it out.
What can I serve with peppermint waffles?
These waffles are delicious with a variety of toppings! I love serving them with maple syrup, whipped cream, or even a drizzle of chocolate sauce. Fresh berries or a sprinkle of crushed candy canes also make for a festive touch!
Can I make the batter ahead of time?
Yes, you can prepare the batter the night before and store it in the fridge. Just give it a good stir before using, as it may thicken up a bit. However, I recommend cooking the waffles fresh for the best texture!
How can I make these waffles dairy-free?
You can easily make these waffles dairy-free by using almond milk or any other plant-based milk in place of regular milk, and substituting the melted butter with coconut oil or a dairy-free butter alternative. They’ll still be delightful!
What if my waffles stick to the iron?
If you find your waffles sticking, make sure you’re greasing the waffle iron well before pouring in the batter. Even non-stick irons can benefit from a bit of oil or melted butter to help them come out easily!