

Oh, the joys of holiday baking! There’s something magical about filling your kitchen with the warm, spicy aromas of gingerbread. This gingerbread cheesecake is truly a showstopper—rich and creamy with that perfect hint of holiday spice. I remember the first time I made this for a family gathering; my house was filled with laughter and the scent of cinnamon and nutmeg wafting through the air. It was a hit! The blend of flavors in this cheesecake is unlike anything else—think classic gingerbread cookies meets a velvety cheesecake. Trust me, once you take that first slice, you’ll be hooked! It’s not just a dessert; it’s a warm hug on a plate. So, gather your ingredients, and let’s get this holiday baking party started!
Ingredients List
- 1 ½ cups graham cracker crumbs
- ½ cup unsalted butter, melted
- 2 tablespoons brown sugar
- 3 (8 oz) packages cream cheese, softened
- 1 cup granulated sugar
- 3 large eggs
- 1 teaspoon vanilla extract
- 1 teaspoon ground ginger
- 1 teaspoon ground cinnamon
- ½ teaspoon ground nutmeg
- ½ teaspoon ground cloves
- 1 cup sour cream
How to Prepare Instructions
Preheat the Oven
First things first, we need to preheat our oven to 325°F (163°C). This step is super important because it ensures that your cheesecake bakes evenly from the start. While the oven is warming up, you can get everything else ready. Trust me, you don’t want to rush this part!
Make the Crust
Now, let’s dive into that delicious crust! In a mixing bowl, combine the graham cracker crumbs, melted butter, and brown sugar. You’re looking for a texture that resembles wet sand—moist but not soggy. Grab your springform pan and press the mixture firmly into the bottom to create a nice, even layer. You want it compact enough that it holds together when you slice into the cheesecake later. Use the back of a measuring cup or your fingers to really pack it down. It’s going to be so worth it!
Prepare the Cheesecake Filling
In a large mixing bowl, beat the softened cream cheese and granulated sugar together until it’s smooth and creamy—this should take about 2–3 minutes. Next, add the eggs one at a time, mixing well after each addition. This step is crucial for a smooth texture! Now, stir in the vanilla extract, ground ginger, cinnamon, nutmeg, and cloves. Oh, the smell is heavenly! Finally, mix in the sour cream until everything is fully combined. Your filling should be luscious and velvety.
Bake the Cheesecake
Pour that glorious cheesecake filling over your prepared crust in the springform pan. It’s looking good already! Bake it in the preheated oven for about 55–60 minutes. You’ll know it’s done when the edges are set, but the center still has a slight jiggle. This ensures it stays creamy and doesn’t dry out. Remember, overbaking is a big no-no!
Cooling and Refrigeration
Once baked, remove the cheesecake from the oven and let it cool in the pan for about an hour. This step helps prevent cracking. After it cools, wrap it in plastic wrap and pop it into the refrigerator. You’ll need to let it chill for at least 4 hours—overnight is even better if you can wait! This allows all those amazing flavors to meld together beautifully. Patience will reward you with the best gingerbread cheesecake you’ve ever tasted!
Why You’ll Love This Recipe
- Rich, creamy flavor that perfectly blends the warmth of gingerbread with the smoothness of cheesecake.
- Festive appeal that makes it an eye-catching centerpiece for holiday gatherings.
- Simple to make with straightforward steps, perfect for both novice and experienced bakers.
- Great for sharing—each slice is a little piece of holiday magic that everyone will adore.
- Can be made ahead of time, leaving you stress-free and ready to enjoy your celebrations.
- A delightful twist on traditional desserts, sure to impress family and friends.
Tips for Success
Making the perfect gingerbread cheesecake is all about those little details that can elevate your dessert from good to absolutely unforgettable. Here are my top tips to ensure your cheesecake turns out just right:
- Room Temperature Ingredients: Trust me on this one! Make sure your cream cheese, eggs, and sour cream are at room temperature before you start mixing. This helps everything blend together smoothly, avoiding lumps and giving you that creamy texture we all crave.
- Don’t Overmix: When you’re adding the eggs and mixing in those spices, be gentle! Overmixing can incorporate too much air, which might lead to cracks during baking. Just mix until you see no more streaks—simple as that!
- Use a Water Bath (Optional): If you want to take it up a notch, consider baking your cheesecake in a water bath. This helps regulate the temperature and keeps the cheesecake moist. Just wrap your springform pan in aluminum foil and place it in a larger pan filled with water.
- Cool Gradually: Letting your cheesecake cool slowly in the oven with the door slightly ajar can help prevent cracking. After baking, turn off the oven and crack the door open for about 30 minutes before taking it out.
- Chill for Flavor: As tempting as it is to dive right in, letting your cheesecake chill for at least 4 hours (or overnight) is essential. This resting period allows all those fabulous gingerbread flavors to develop fully and makes for an even better taste experience.
Follow these tips, and you’ll be well on your way to impressing everyone with your incredible gingerbread cheesecake! Happy baking!
Storage & Reheating Instructions
Once you’ve made this delightful gingerbread cheesecake, you’ll want to make sure it stays fresh and delicious for as long as possible. To store any leftovers (if there are any!), simply cover the cheesecake tightly with plastic wrap or aluminum foil, or transfer it to an airtight container. Pop it in the refrigerator, where it will keep well for up to 5 days. This cheesecake is so rich and flavorful that it actually gets better as it sits, allowing all those lovely spices to deepen in flavor.
If you want to save it for a special occasion or just for a cozy night in, you can freeze it too! Just slice it into portions, wrap each slice securely in plastic wrap, and then place them in a freezer-safe bag or container. Your cheesecake can be frozen for up to 2 months. When you’re ready to indulge, simply take a slice out and let it thaw in the refrigerator overnight. No need to reheat—serve it chilled, and enjoy the creamy, spiced goodness that awaits!
Nutritional Information
Here’s the estimated nutritional information for each slice of this delightful gingerbread cheesecake. Keep in mind that these values can vary based on specific ingredients used and portion sizes, but this should give you a good general idea:
- Calories: 350
- Fat: 20g
- Saturated Fat: 12g
- Unsaturated Fat: 8g
- Trans Fat: 0g
- Cholesterol: 85mg
- Sodium: 320mg
- Carbohydrates: 36g
- Fiber: 1g
- Sugar: 24g
- Protein: 6g
Enjoy this rich and creamy dessert in moderation, and savor every delicious bite!
FAQ Section
Can I substitute the cream cheese?
Yes, you can use mascarpone cheese for a slightly different flavor and texture, but keep in mind it may be richer. Just make sure it’s well softened for easy mixing!
What if I don’t have a springform pan?
No worries! You can use a regular round cake pan, but I recommend lining the bottom and sides with parchment paper for easier removal. Just be gentle when you’re taking it out!
Can I make this cheesecake gluten-free?
Absolutely! Just swap the graham cracker crumbs for gluten-free ones, or even ground almonds or oats for a tasty alternative. The spices will shine through just the same!
How should I serve gingerbread cheesecake?
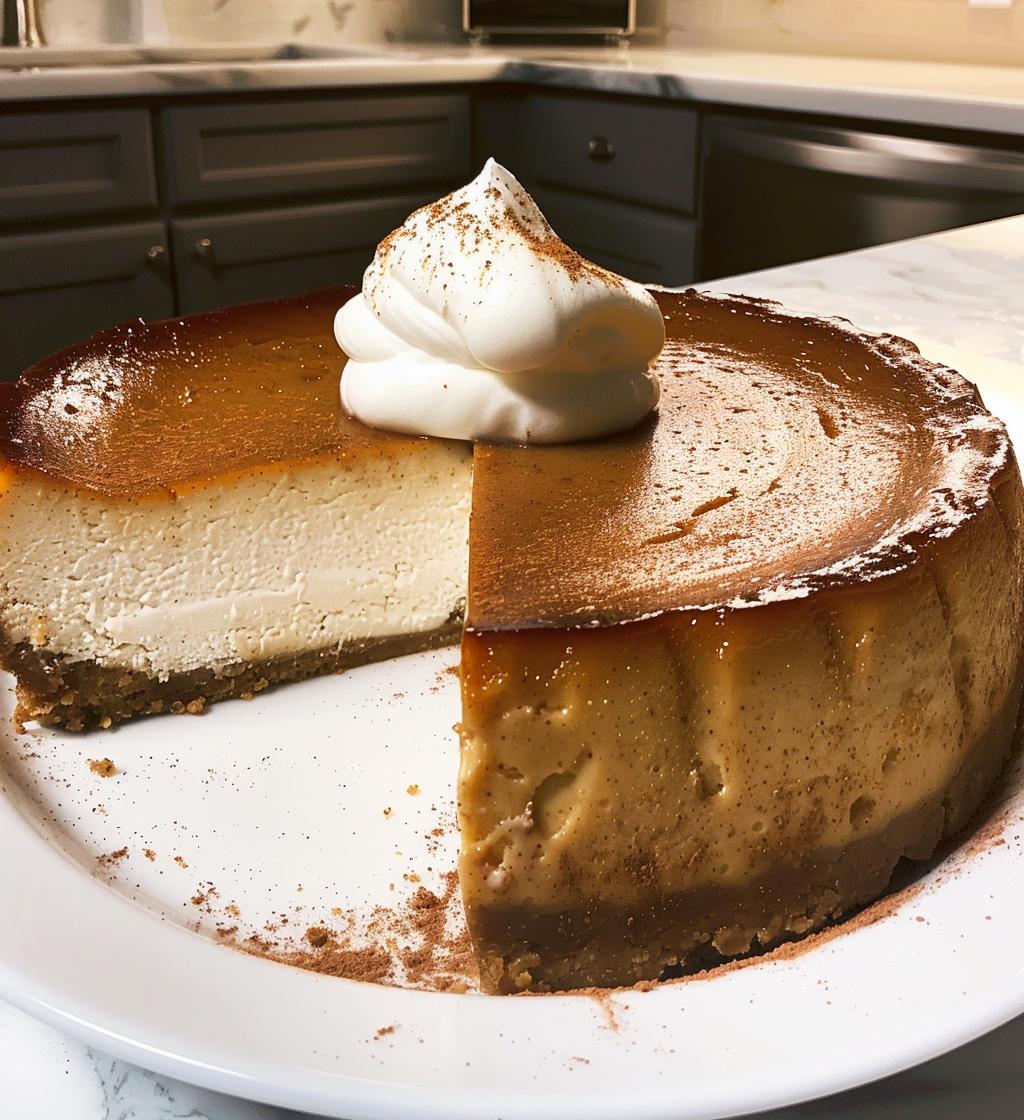
For an extra festive touch, top your slices with whipped cream, a drizzle of caramel sauce, or even some crushed gingerbread cookies. It adds that perfect finishing touch and looks beautiful!
Can I make this cheesecake in advance?
Definitely! In fact, I recommend making it a day or two ahead of time. This way, the flavors can really develop, and you can enjoy a stress-free serving on the day of your gathering!