

Oh, let me tell you about my absolute love for vanilla wafers! There’s something so nostalgic and comforting about them, isn’t there? I remember as a kid, my grandma would always have a box of these delightful cookies on hand, and I could never resist sneaking a few straight from the pantry. This no-bake dessert made with vanilla wafers is one of my go-to recipes when I want something quick, easy, and utterly delicious. It’s perfect for warm days or when I’m short on time but still want a sweet treat to impress friends or family! You can whip it up in just 15 minutes, and trust me, the creamy layers and crunchy wafers come together to create a dream dessert that everyone will love. Give it a try—you won’t regret it!
Ingredients List
- 2 cups vanilla wafers: These delightful cookies are the star of the show! You can use any brand you love, just crush them to create that perfect base.
- 1 cup whipped cream: You can use either homemade or store-bought whipped cream. If you’re feeling adventurous, I always recommend whipping your own for that fresh taste!
- 1 cup vanilla pudding: Make sure it’s prepared according to the package instructions, or you can whip up a batch from scratch if you’re feeling fancy.
- 1/2 cup chocolate chips: Semi-sweet chocolate chips work wonderfully here, but feel free to use milk chocolate or even white chocolate if you prefer a different twist!
How to Prepare Instructions
Now let’s dive into making this delicious dessert! It’s super simple and follows a few easy steps that will have you impressing everyone in no time. Ready? Let’s go!
Step 1: Crush the Vanilla Wafers
First things first, we need to crush those vanilla wafers! You can use a food processor for a quick job, but if you don’t have one, just place the wafers in a zip-top bag and smash them with a rolling pin or even a heavy skillet. Aim for a crumbly consistency—some larger chunks are totally fine, as they add a nice crunch later!
Step 2: Prepare the Cream Mixture
In a separate bowl, combine the whipped cream and vanilla pudding. Gently fold them together using a spatula or a whisk until everything is well blended. You want it nice and fluffy, so be careful not to over-mix. This mixture is where all the creaminess comes from, so take your time to get it just right!
Step 3: Combine Ingredients
Now it’s time to add those crushed vanilla wafers to your cream mixture. Gently fold them in until they’re evenly distributed—this creates that dreamy layer of flavor! Make sure everything is combined well, but don’t worry about being too perfect. A few lumps can add character!
Step 4: Layer the Mixture
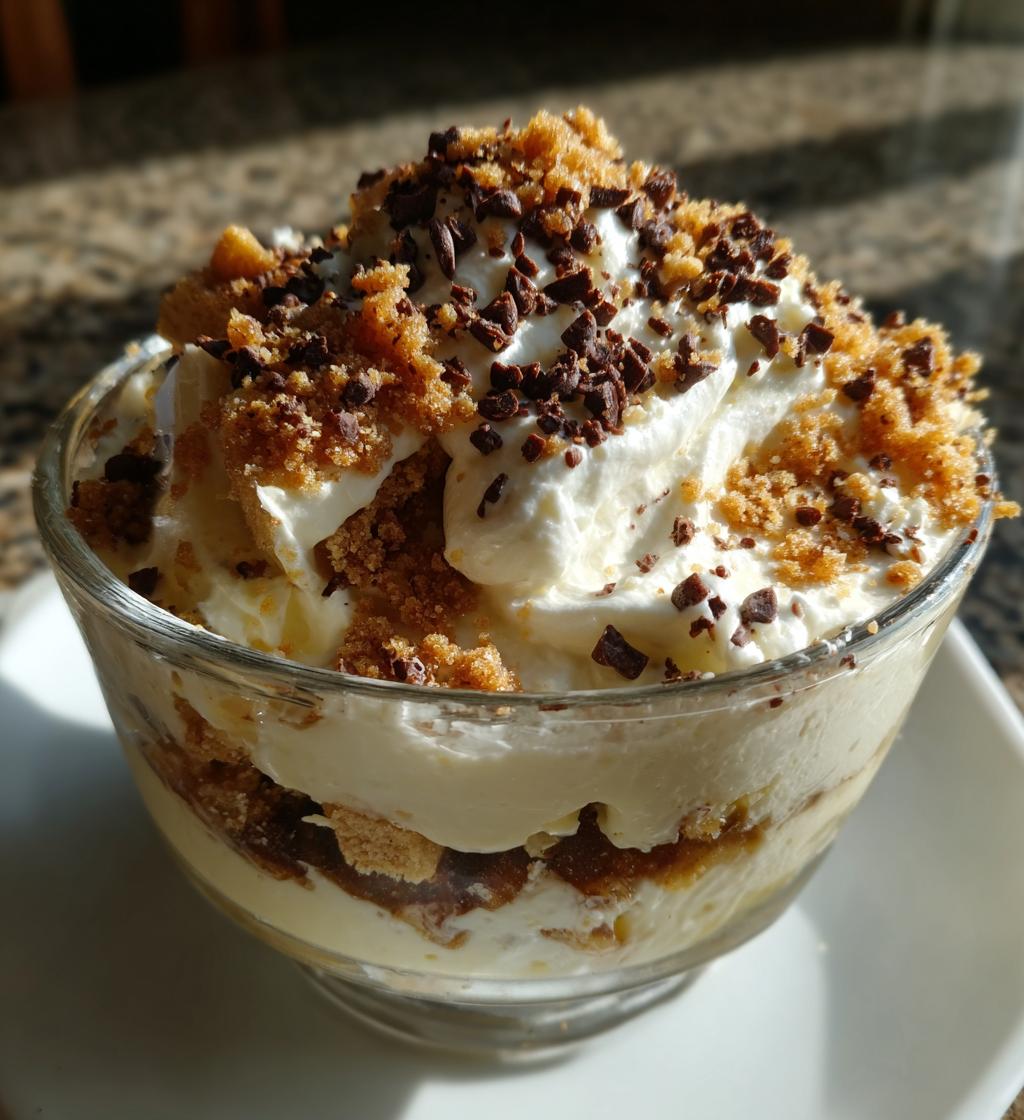
Grab your serving dish and start layering the mixture. I like to spoon in a layer of the cream-wafers mix, then add another layer of the mixture on top. You can get creative here! If you’re using a glass dish, it’s fun to see the layers, so try to make them look pretty. Aim for at least two layers for that wow factor!
Step 5: Add Toppings
Once you’ve layered everything, it’s time to sprinkle those chocolate chips on top! Feel free to get creative—add some crushed nuts or even fresh fruit if you’re feeling adventurous. The toppings not only look great but also add that extra crunch and flavor!
Step 6: Chill Before Serving
Finally, don’t forget to chill your dessert in the fridge for at least 2 hours. This step is crucial because it helps the flavors meld together and gives the dessert a nice, firm texture. Trust me, the wait is worth it. When you’re ready to serve, just scoop it out and enjoy the creamy, crunchy goodness!
Why You’ll Love This Recipe
- Quick preparation: You can whip this up in just 15 minutes—perfect for when you’re short on time!
- No baking required: This dessert is a total lifesaver, especially on hot days when you don’t want to turn on the oven.
- Delicious flavor: The combination of creamy vanilla pudding and crunchy wafers creates a delightful treat that everyone will adore.
- Versatile with fruits: Feel free to add fresh fruits like strawberries or bananas for an extra burst of flavor and color!
- Kid-friendly: It’s a fun and easy recipe that kids can help with, making it a great family activity.
Tips for Success
To make sure your vanilla wafer dessert turns out perfectly, here are a few tips you’ll want to keep in mind! First, when crushing the wafers, don’t fret if you have a few larger pieces—they add great texture, but aim for mostly crumbs for the best layering. If you’re using store-bought whipped cream, make sure it’s fresh, as that really enhances the flavor. Also, be gentle when folding in the whipped cream with the pudding; over-mixing can deflate that lovely fluffiness! And remember, chilling is key! If you can let it sit longer than 2 hours, go for it—the flavors will only get better. Lastly, if you’re adding fruits, do it just before serving to keep everything fresh and vibrant. Enjoy your delicious creation!
Nutritional Information Section
Here’s the estimated nutritional information for this delightful vanilla wafer dessert. Keep in mind that these values can vary based on the specific brands you use and any additional ingredients you might add. But this will give you a general idea:
- Serving Size: 1 serving
- Calories: 220
- Fat: 10g
- Saturated Fat: 5g
- Unsaturated Fat: 3g
- Trans Fat: 0g
- Cholesterol: 15mg
- Sodium: 150mg
- Carbohydrates: 30g
- Fiber: 1g
- Sugar: 10g
- Protein: 3g
This dessert is not only a sweet treat but also offers a nice balance of flavors and textures in every bite. Enjoy it guilt-free, knowing you’re savoring something delicious!
FAQ Section
Can I use something other than vanilla wafers?
Absolutely! If you want to switch things up, you can use graham crackers or even chocolate cookies for a twist. Just remember that the flavor and texture will vary a bit, but it’ll still be delicious!
How should I store leftovers?
Store any leftovers in an airtight container in the fridge. It should stay fresh for about 3-4 days. Just keep in mind that the longer it sits, the softer the wafers will become, so I recommend enjoying it as soon as you can!
Can I add fruits to the layers?
Definitely! Fresh fruits like strawberries, bananas, or blueberries can add a delightful burst of flavor and color. Just slice them up and layer them in between the cream mixture or sprinkle them on top before serving for a fresh touch!
Is it possible to make this dessert dairy-free?
Yes, you can use dairy-free whipped cream and pudding to make this dessert dairy-free. There are plenty of great options available at grocery stores these days, and they taste amazing!
What’s the best way to serve this dessert?
I love serving it chilled right from the fridge in individual bowls or cups. You can also scoop it into a beautiful glass dish for a stunning presentation. Just remember to add those chocolate chips and any fruits right before serving for that fresh look!
Storage & Reheating Instructions
Storing your vanilla wafer dessert is super easy! Just cover the serving dish with plastic wrap or transfer any leftovers into an airtight container. Pop it in the fridge, and it should stay fresh for about 3-4 days. Keep in mind that the longer it sits, the softer the vanilla wafers will become, which can change the texture a bit, so I recommend enjoying it sooner rather than later.
As for reheating, this dessert is best served cold, so there’s really no need to heat it up. Just scoop out what you want and enjoy it straight from the fridge! If you’ve added any fresh fruits, I suggest waiting to add those until you’re ready to serve to keep them looking and tasting their best. Trust me, a chilled bite of this creamy goodness is just what you want on a warm day!
Print
Vanilla Wafers: 15-Minute Dreamy Dessert Delight
- Prep Time: 15 minutes
- Cook Time: 0 minutes
- Total Time: 2 hours 15 minutes
- Yield: Serves 6
- Category: Dessert
- Method: No-bake
- Cuisine: American
- Diet: Vegetarian
Description
A tasty dessert made with vanilla wafers.
Ingredients
- 2 cups vanilla wafers
- 1 cup whipped cream
- 1 cup vanilla pudding
- 1/2 cup chocolate chips
Instructions
- Crush the vanilla wafers in a bowl.
- In another bowl, mix the whipped cream and vanilla pudding.
- Add the crushed wafers to the cream mixture.
- Layer the mixture in a serving dish.
- Sprinkle chocolate chips on top.
- Chill for 2 hours before serving.
Notes
- Use homemade or store-bought whipped cream.
- Feel free to add fruits for extra flavor.
Nutrition
- Serving Size: 1 serving
- Calories: 220
- Sugar: 10g
- Sodium: 150mg
- Fat: 10g
- Saturated Fat: 5g
- Unsaturated Fat: 3g
- Trans Fat: 0g
- Carbohydrates: 30g
- Fiber: 1g
- Protein: 3g
- Cholesterol: 15mg
Keywords: vanilla wafers, dessert, no-bake