

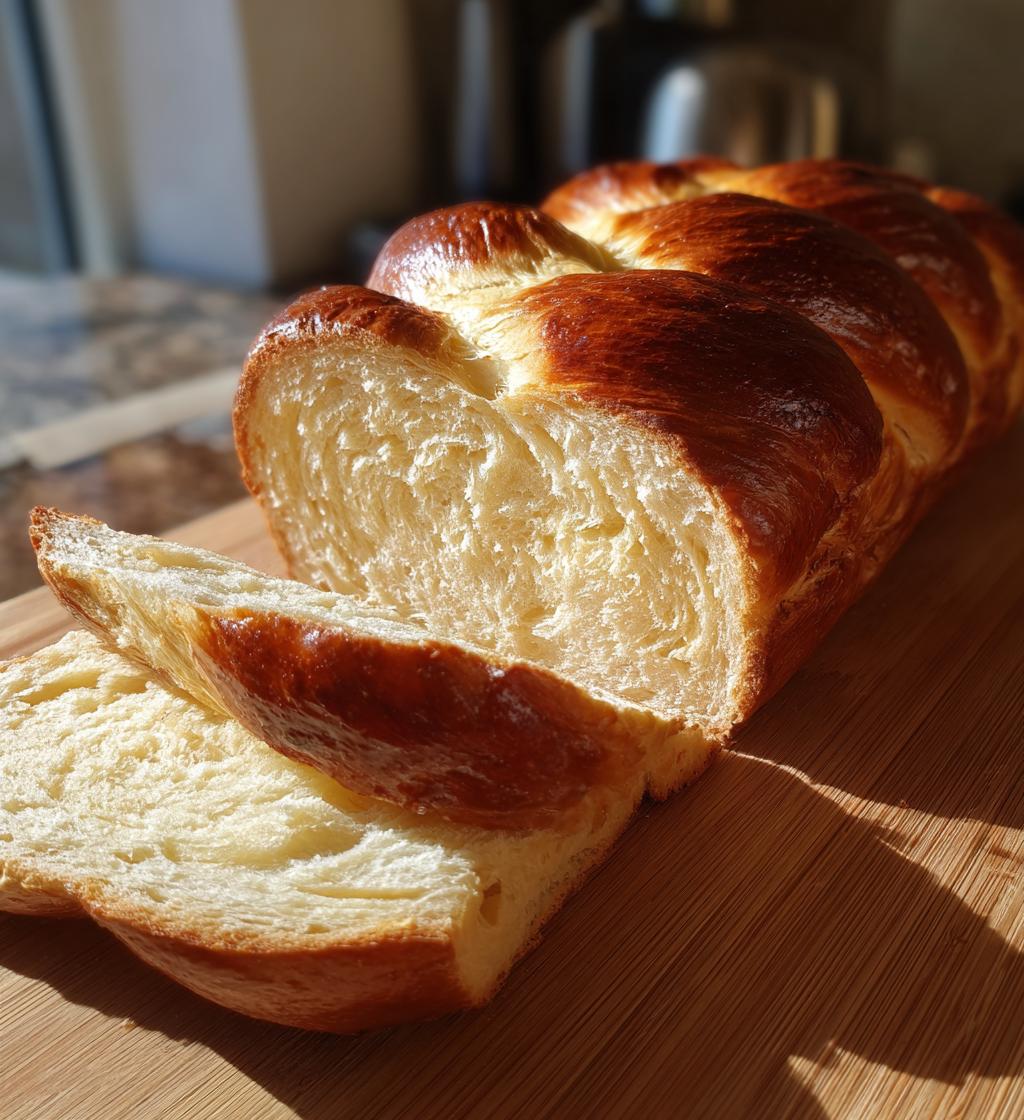
Ah, challah bread! There’s something so special about making this sweet, braided bread that brings back the warmth of family gatherings and the joy of tradition. I remember the first time I helped my grandmother in the kitchen, her hands deftly weaving the dough while sharing stories of our ancestors. Challah is more than just bread; it’s a symbol of celebration, especially during the Jewish Sabbath and holidays. The beautiful golden crust and soft, fluffy interior make it irresistible, whether you’re enjoying it fresh out of the oven or using it for delicious French toast the next day. Trust me, once you try making your own challah, you’ll feel a connection to this lovely tradition.
Ingredients for Challah Bread
Let’s gather our ingredients! You’ll want everything nice and fresh for the best flavor. Here’s what you need:
- 4 cups all-purpose flour – This is the foundation of our challah, giving it that lovely structure.
- 1/2 cup granulated sugar – This adds just the right amount of sweetness to make it delightful.
- 2 teaspoons salt – A little salt helps balance the sweetness and enhances the flavors.
- 1 packet active dry yeast (about 2 1/4 teaspoons) – This is our magic ingredient for that fluffy texture!
- 1 cup warm water (about 110°F or 43°C) – It helps activate the yeast, so make sure it’s not too hot or too cold.
- 1/4 cup vegetable oil – This keeps the bread moist and tender.
- 3 large eggs – These add richness and help with binding the dough.
- 1 egg for egg wash – This will give our challah that gorgeous golden finish when baked.
Gather these ingredients, and let’s get ready to create something truly special! You’ll love the aroma that fills your kitchen as you bake this traditional bread.
How to Prepare Challah Bread
Making the Dough
Let’s get our hands a little messy! First, in a small bowl, dissolve the active dry yeast in the warm water with a pinch of sugar. Let it sit for about 10 minutes until it’s all frothy and bubbly—this is how you know your yeast is alive and kicking! In a large bowl, mix together the flour, sugar, and salt. Once that’s combined, add in the yeast mixture, vegetable oil, and the 3 large eggs. Now, it’s time to knead! Turn the dough out onto a floured surface and knead for about 10 minutes until it’s smooth and elastic. You want it to be slightly tacky but not sticky—just the right consistency for a perfect loaf.
The First Rise
Once your dough is kneaded to perfection, place it in an oiled bowl and cover it with a clean kitchen towel. Now, let it rise in a warm spot for about 1 hour. You’ll want to see it double in size—that’s the magic of yeast at work! If your kitchen is a bit chilly, you could preheat the oven to 200°F (93°C) for a minute, then turn it off and place the dough inside; it loves that cozy warmth.
Shaping the Challah
After the dough has risen, it’s time for the fun part—shaping! Punch down the dough gently to release the air, then divide it into three equal parts. Roll each piece into long strands, about 12 inches each. Now, braid those strands together! Start at the top and pinch to secure, then alternate folding the strands over one another. Once braided, place it on a baking sheet lined with parchment paper and cover it again with a towel. Let it rise for another 30 minutes to puff up beautifully.
Baking the Challah
Preheat your oven to 350°F (175°C) while the dough is finishing its second rise. Before baking, brush the braided loaf with the beaten egg for that stunning golden finish. Bake it in the oven for about 30-35 minutes, or until it’s golden brown and sounds hollow when tapped on the bottom. Oh, the smell of fresh challah filling your kitchen is simply irresistible! Let it cool on a wire rack before slicing, and then get ready to enjoy this delightful bread.
Tips for Success
To ensure your challah bread turns out perfectly every time, here are some tips I’ve picked up along the way! First, be sure to measure your flour correctly—too much can lead to a dense bread. I like to spoon the flour into the measuring cup and level it off for accuracy. If you’re out of vegetable oil, you can substitute it with melted butter for a richer flavor.
When kneading, don’t rush it! It’s important to develop that gluten, which gives the bread its structure. If you find your dough is too sticky, sprinkle a little more flour as you knead. For the rising times, keep an eye on the dough; sometimes it may need a bit longer, especially in cooler weather. And remember, the dough should double in size, so patience is key! Trust me, the wait is worth it for that fluffy, golden loaf.
Variations on Challah Bread
One of the best things about challah bread is how customizable it can be! You can easily add different flavors to make it your own. For a sweet twist, try mixing in some raisins or chocolate chips into the dough before braiding. If you’re feeling adventurous, a sprinkle of cinnamon or nutmeg can add a warm, aromatic touch. Topping your braided loaf with sesame seeds or poppy seeds gives it a delightful crunch and a beautiful finish. You can even experiment with adding herbs like rosemary or garlic for a savory version—perfect for pairing with soups or stews. The possibilities are endless, so let your creativity shine!
Nutritional Information
So, let’s talk numbers! While the joy of baking challah bread is in the experience and the delicious results, knowing a bit about its nutritional profile can be helpful too. Here’s what you can expect for each slice of this delightful bread:
- Calories: 150
- Fat: 4g
- Saturated Fat: 0.5g
- Unsaturated Fat: 3.5g
- Trans Fat: 0g
- Cholesterol: 30mg
- Sodium: 100mg
- Carbohydrates: 25g
- Fiber: 1g
- Sugar: 5g
- Protein: 4g
Keep in mind that these values are estimates based on typical ingredients used, and they can vary based on modifications and additions you choose. So, whether you’re enjoying a warm slice with butter or using it for a decadent French toast, you can savor your challah with a little knowledge in your back pocket!
FAQ About Challah Bread
As you’re diving into the wonderful world of challah bread, you might have a few questions. Don’t worry, I’ve got you covered! Here are some common queries that come up:
How should I store my challah bread?
Once your challah has cooled completely, you can store it in an airtight container at room temperature for up to 3 days. If you want to keep it longer, I recommend freezing it. Just wrap it tightly in plastic wrap and then again in aluminum foil or a freezer bag. It can last up to 2 months in the freezer. Just thaw it overnight in the fridge when you’re ready to enjoy!
Can I use challah bread for French toast?
Absolutely! In fact, challah bread makes the best French toast because of its slight sweetness and fluffy texture. Just slice it thick, dip it in your favorite egg mixture, and cook until golden brown. Trust me, it’s a game changer for brunch!
What can I serve with challah bread?
Challah is so versatile! You can enjoy it plain with a bit of butter, or serve it alongside soups and stews for a comforting meal. It’s also fantastic for sandwiches or toasted with jam. And during special occasions, don’t forget to pair it with a nice wine or sweet wine for a delightful treat!
Can I make challah bread ahead of time?
Yes, you can! If you’d like to prepare it in advance, you can make the dough and let it rise, then shape it and refrigerate before the final rise and baking. Just let it sit at room temperature for about 30 minutes before baking, and you’ll be good to go!
Is it okay to add ingredients like raisins or nuts to my challah?
Definitely! Adding ingredients such as raisins, nuts, or even chocolate chips can bring a fun twist to your challah. Just fold them into the dough after the first kneading. It’s a great way to personalize your loaf and make it even more delicious.
Why You’ll Love This Recipe
- It’s an easy-to-follow recipe that even beginners can master!
- The sweet, rich flavor of homemade challah is simply unbeatable.
- It’s a beautiful centerpiece for any holiday table or family gathering.
- The process of braiding the dough is both fun and therapeutic.
- You’ll fill your kitchen with the most amazing aroma while it bakes.
- This recipe is versatile; you can customize it with your favorite additions.
- Challah bread keeps well, making it perfect for leftovers or freezing.
- It’s a wonderful way to connect with tradition and family heritage.
- Each slice is perfect for French toast, sandwiches, or simply slathered with butter.

Challah Bread: 7 Amazing Tips for Perfectly Fluffy Loaf
- Prep Time: 20 minutes
- Cook Time: 35 minutes
- Total Time: 1 hour 55 minutes
- Yield: 1 loaf 1x
- Category: Bread
- Method: Baking
- Cuisine: Jewish
- Diet: Vegetarian
Description
Challah bread is a sweet, braided bread traditionally eaten during Jewish Sabbath and holidays.
Ingredients
- 4 cups all-purpose flour
- 1/2 cup sugar
- 2 teaspoons salt
- 1 packet active dry yeast
- 1 cup warm water
- 1/4 cup vegetable oil
- 3 large eggs
- 1 egg for egg wash
Instructions
- In a bowl, dissolve yeast in warm water with a pinch of sugar.
- Let it sit for 10 minutes until frothy.
- In a large bowl, mix flour, sugar, and salt.
- Add yeast mixture, oil, and eggs to the dry ingredients.
- Knead the dough for about 10 minutes until smooth.
- Place the dough in an oiled bowl, cover, and let it rise for 1 hour.
- Punch down the dough and divide it into three equal parts.
- Braid the three pieces together and place on a baking sheet.
- Cover and let rise for another 30 minutes.
- Preheat the oven to 350°F (175°C).
- Brush the braid with the beaten egg.
- Bake for 30-35 minutes until golden brown.
Notes
- For a sweeter bread, add more sugar.
- Challah can be frozen for later use.
- Use sesame seeds for topping if desired.
Nutrition
- Serving Size: 1 slice
- Calories: 150
- Sugar: 5g
- Sodium: 100mg
- Fat: 4g
- Saturated Fat: 0.5g
- Unsaturated Fat: 3.5g
- Trans Fat: 0g
- Carbohydrates: 25g
- Fiber: 1g
- Protein: 4g
- Cholesterol: 30mg
Keywords: challah bread, sweet bread, braided bread